Amazon Cloud EC2 : Create and configure free tier account

Amazon Cloud EC2 : Create and configure free tier account

Are you searching for Free tier amazon AWS EC2 guide or tutorial ? Those who are working on Setup, configure and maintaining AWS amazon Server EC2 and S3 bucket. Here is the perfect guide for you. Sys Admins will love the guide.

Steps to create Amazon EC2 cloud account, 

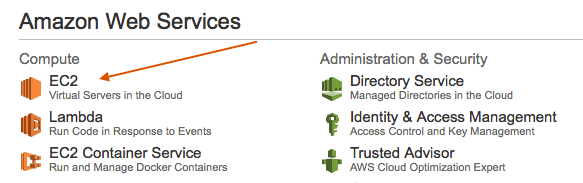
1. GO to EC2 console and click on Instances at the left panel and Click on Launch Instance 

Create Amazon EC2 account

2. Select the AmazonMachine Image (AMI) which you want. (I have selected the 1st one ie amazon linux AMI)

Chose Amazon Machine (AMI)


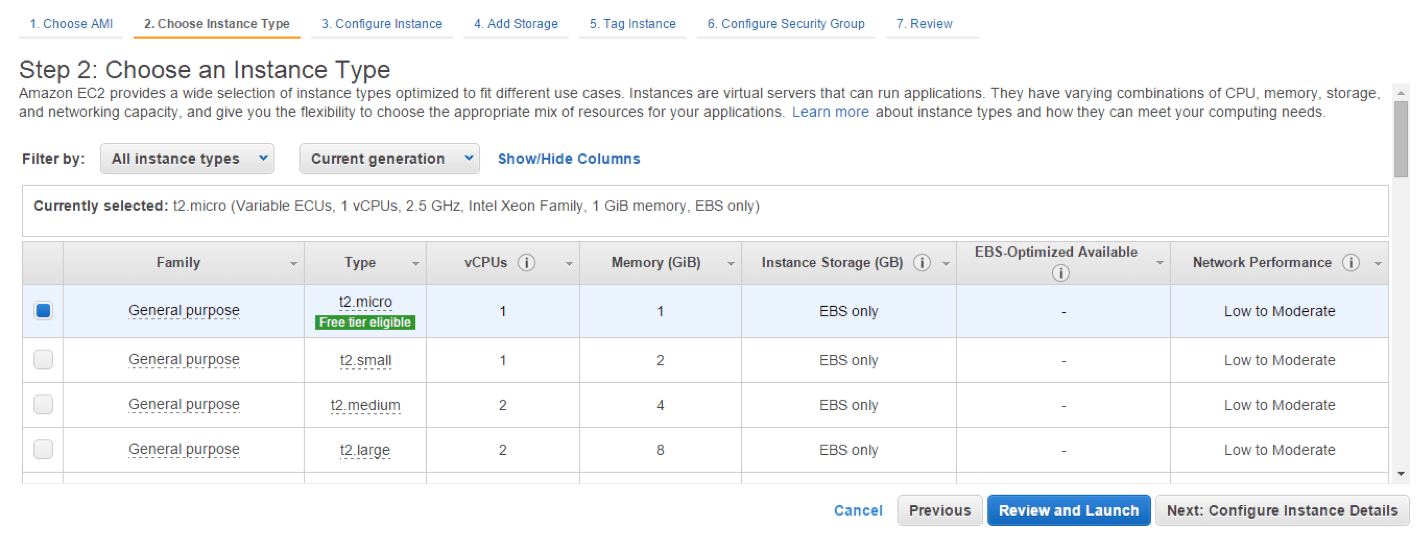
3. By default General purpose is selected ie free-tier (t2.micro type). (You can select the any instance type you want based on your requirement) (I have selected the free tier t2.micra which comes with 1 GB ram by default)

Amazon EC2 Instance type


4. Click Next tab at the below to configure the corresponding details. And in configure Security Group step select the Select an existing security group radio button and then Click on Review and Launch

5. Click on Review and Launch.

6. Once you click on Launch it will ask you to create key pair. Select Create New Key Pair from the drop down and give some name and click on Download key pair (It will helpful in future to connect Amazon server using putty). It will download one .pem file with the given name

7. Click on Launch Instances, this completed the creation of Amazon instances. In the next screen click on the view instances

Amazon EC2 launch instance

 Amazon EC 2 DB instance creation 

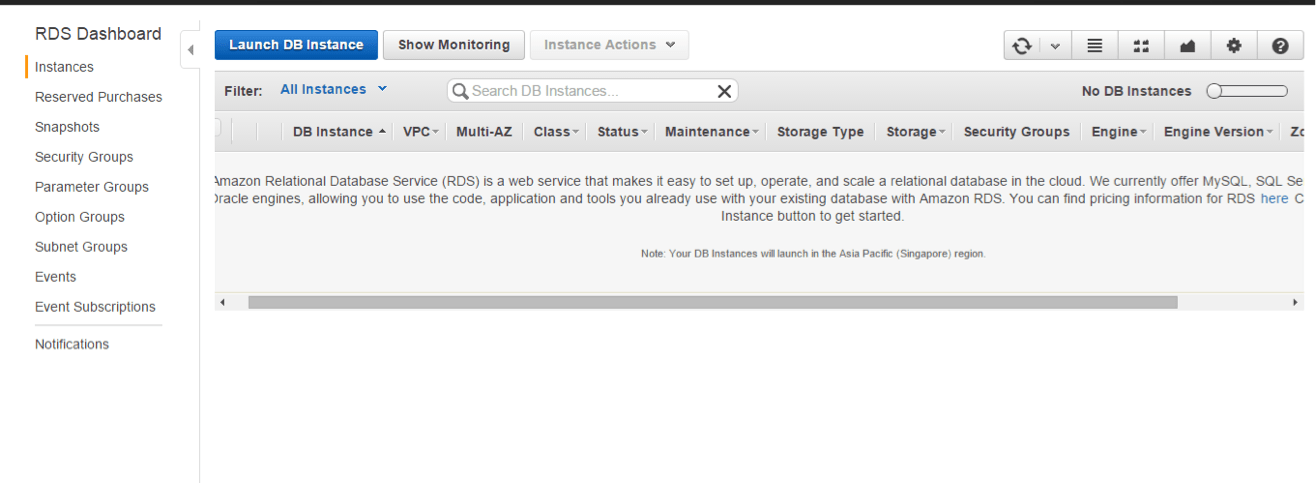
1. Click on Services at the top bar select RDS at the left panel, Select DataBase under all services and then select RDS

Amazon EC2 DB creation

2. Click on instances at the left panel and click on Launch DB Instance.

Amazon EC2 DB instance create


3. Select the required DB engine. (I am selecting MySql)

4. Production Select the No radio button for the free tier version and click on next step.

Amazon EC2 DB instance free tier


5. Fill the DB details in with the below details.

License Model : General-public-license

DB Engine Version : 5.6.2.3

DBInstance Class : db.t2.micra -1vCPU, 1 GB RAM

Multi-AZ Deployment : No

Storage Type : General Purpose (SSD)

Allocated Storage : 5

Provide the DB instance identifier, Master username and Passwor (these details will be usefull later for DB connection from the application or to connect from the sql clients)

Click on Next Step : Configure the advance details as shown below image for free tier.

Amazon EC2 DB Instance Advanced Settings

Amazon EC2 DB instance Advanced Settngs
Amazon EC2 DB instance Advanced Settings


Amazon EC2 DB instance Advanced Settings 1


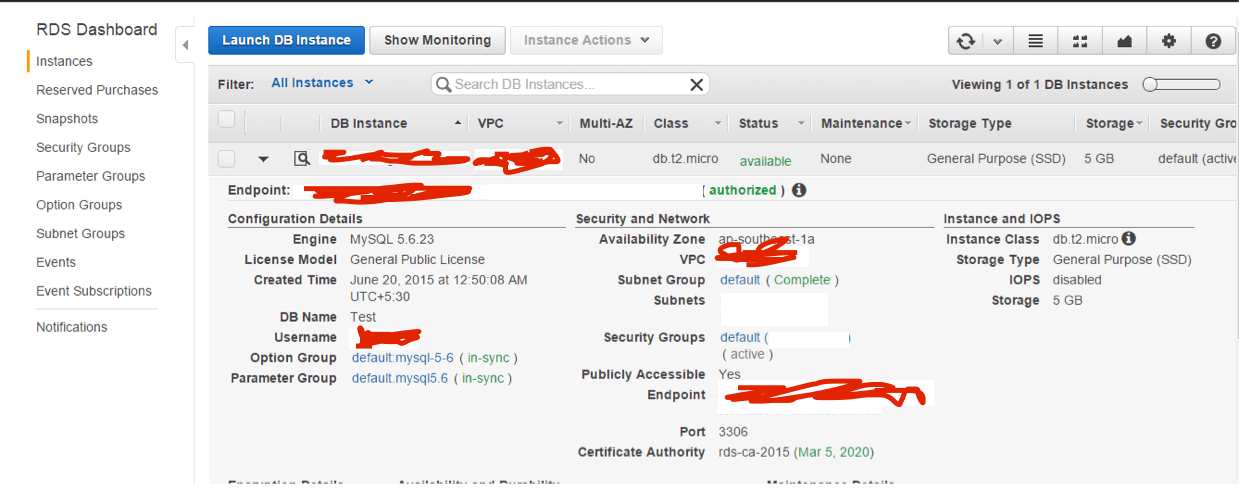
5. Click on the Launch DB Instances and click on view DB instance to see the DB details. (It may take some time to create the DB)

Amazon EC2 Launch DB Instance


Also Read : How to Configure Amazon EC2 Security group 

Also Read : An Interesting Article on how Facebook using aircrafts, laser beam to provide internet to remote areas on earth

Also Read : Interesting Article on How Facebook Using Artificial Intelligence, Facebook identifies you based on your hair style, your dressing, your standing posture

Also Read Windows 10 upgrade is available : See what you have to do if you can’t wait 🙂

Also Read : 8 Ways IOT will change your life .

Also Read : Is Google+ struggling ?

Amazon AWS EC2 Security Group and S3 Bucket Configuration

Amazon AWS EC2  Security Group and S3 Bucket configuration

Read our previous post : How to Create And Configure Amazon EC2 Free tier account

Amazon AWS is an awesome cloud service, It is worth writing a post on AWS service and its usage.

It is very easy to create an AWS account and use it, but most people will struck when its matter of security. Amazon setup is little bit complicated for security configuration. Please follow the steps given below to enable security group in your amazon cloud service.

Steps For Amazon EC2 Security Group:

Step 1: Go to your EC2 Service as shown in the image below

EC2
EC2

Step 2: Go to the section Security Group

Amazon Security Group


Step 3: Enter Group Details 

Amazon Security group details


Step 4: Add following rules 

Inbound

  • Rule 1

 Type : HTTP

 Protocol : TCP

 Port Range : 80

 Source : 0.0.0.0/0

  • Rule 2

 Type : All traffic

 Protocol : All traffic

 Port Range : All traffic

 Source : Your Ip Address ( search in google What Is My IP, copy paste the same IP here )

  • Rule 3

 Type : SSH

 Protocol : TCP

 Port Range : 22

 Source : Your Security Group Id

  • Rule 4

 Type : MYSQL

 Protocol : TCP

 Port Range : Mysql port ( 3306 )

 Source : Your Security Group Id

Outbound

  • Rule 1

 Type : HTTP

 Protocol : TCP

 Port Range : 80

 Source : 0.0.0.0/0

  • Rule 2

 Type : All traffic

 Protocol : All traffic

 Port Range : All traffic

 Source : Your Ip Address ( search in google What Is My IP, copy paste the same IP here )

  • Rule 3

 Type : MYSQL

 Protocol : TCP

 Port Range : Mysql port ( 3306 )

 Source : Your Security Group Id

Amazon S3 Bucket configuration

Step 1 : Go to Administration and Security from Amazon Services

Amazon S3 : IAM
Amazon S3 : IAM


Step 2 : Select Group from the IAM page

Step 3: Create new group, Give any name for the group

Step 4: The most important step is to set Policy type for the S3 bucket.

For file upload/download, Select AmazonEC2FullAccess

If this is done then your Amazon S3 is ready for use.

Step 5: Go to S3 service from the main menu

There create new bucket. Set permissions to your bucket as per your need.

File Upload to Amazon S3 bucket in Java 

Code Sample :

private static String bucketName = “”; //Give your YourS3Bucket name
private static String keyName = “”; // Give SomeKey

public final static String FOLDER_PATH = “TestFolder”;

public final static String rootServerURL = “”; //Your S3 Bucket Path => Your Amazon Instance / BucketName

BasicAWSCredentials awsCreds = new BasicAWSCredentials(“AccessKey”, “SecretKey”);

AmazonS3 s3client = new AmazonS3Client(awsCreds);

PutObjectRequest putObjectRequest = new PutObjectRequest(bucketName, keyName, fileObject);
putObjectRequest.withCannedAcl(CannedAccessControlList.PublicRead); // Read Permission for all
s3client.putObject(putObjectRequest);