Server Side Rendering (SSR) in React 16 with create-react-app using Material Ui, Redux and Express Libraries

What is Server Side Rendering in React (SSR)?

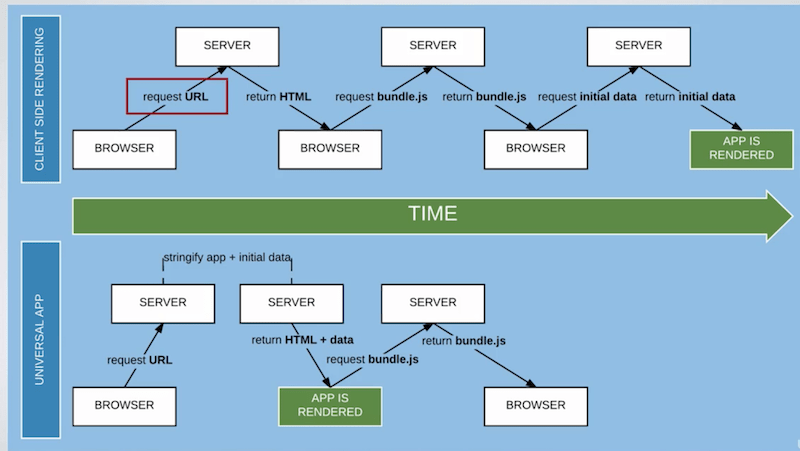
Server side rendering is normally rendering the requested page at server side of client and sending back the whole html page from server.
i.e: Server-side rendering is all about handling the initial render whenever a request hits the server. For more on basics of SSR please read my first article

Let us see how to implement server side rendering in ReactJs

How to Enable Server Side Rendering using React and ExpressJS

[AdSense-B]

Dependencies:

React: 16.7.0
Material Ui Library from Google: v3.9.3
redux: 4.0.1
redux-thunk: 4.0.1
express: 4.17.1
react-jss: 8.6.1
react-router-dom: 4.3.1
react-document-meta: 2.1.2
axios: 0.19.0
@babel/plugin-proposal-class-properties: 7.4.0
@babel/preset-env: 7.4.3
@babel/register: 7.4.4
babel-preset-es2015: 6.24.1

Step1: Create React Application
Create a react app using command create-react-app
Install the create-react-app globally on your machine with below command.

npm install -g create-react-app

Create a project by create-react-app as follows

create-react-app ssr-react-16


Step2: Install necessary npm packages for React server side rendering applicationInstall the following packages by running the following commands, if necessary please use the same version too.

[AdSense-A]

npm install @material-ui/core
npm install  react-redux
npm install redux
npm install redux-thunk 
npm install express
npm install react-router-dom
npm install react-document-meta
npm install react-jss
npm install axios
npm install @babel/plugin-proposal-class-properties
npm install @babel/preset-env
npm install @babel/register
npm install babel-preset-es2015

Thats it now your app is ready with library setup

Step3: babel configs for react server side app
Create a file called .babelrc in root directory of the app and paste the below code.
Babel is a toolchain that is mainly used to convert ECMAScript 2015+ code into a backwards compatible version of JavaScript in current and older browsers or environments. For more you can read the babel doc.

{
  "presets": ["@babel/env", "@babel/preset-react"],
  "plugins": [
    "@babel/plugin-proposal-class-properties"
  ]
}

Step4:
Create a file called www under bin folder which is in root directory
In this file we will be creating a server for client and allocate a port (I am using 5000 here)
Copy the code below to file just created

const app = require('../src/client/src/ssr/clientServer');
const http = require('http');

const port = normalizePort(process.env.PORT || 5000);
app.set('port', port);

const server = http.createServer(app);
server.listen(port);

function normalizePort(val) {
  const port = parseInt(val, 10);
  if (isNaN(port)) {
    // named pipe
    return val;
  }
  if (port >= 0) {
    // port number
    return port;
  }
  return false;
}

In the above code snippet, we are importing a file called clientServer.js that’s covered in the next step.

[AdSense-B]

Step5: ReactJS server side script to initialise server part of client app.
Create a file clientServer.js
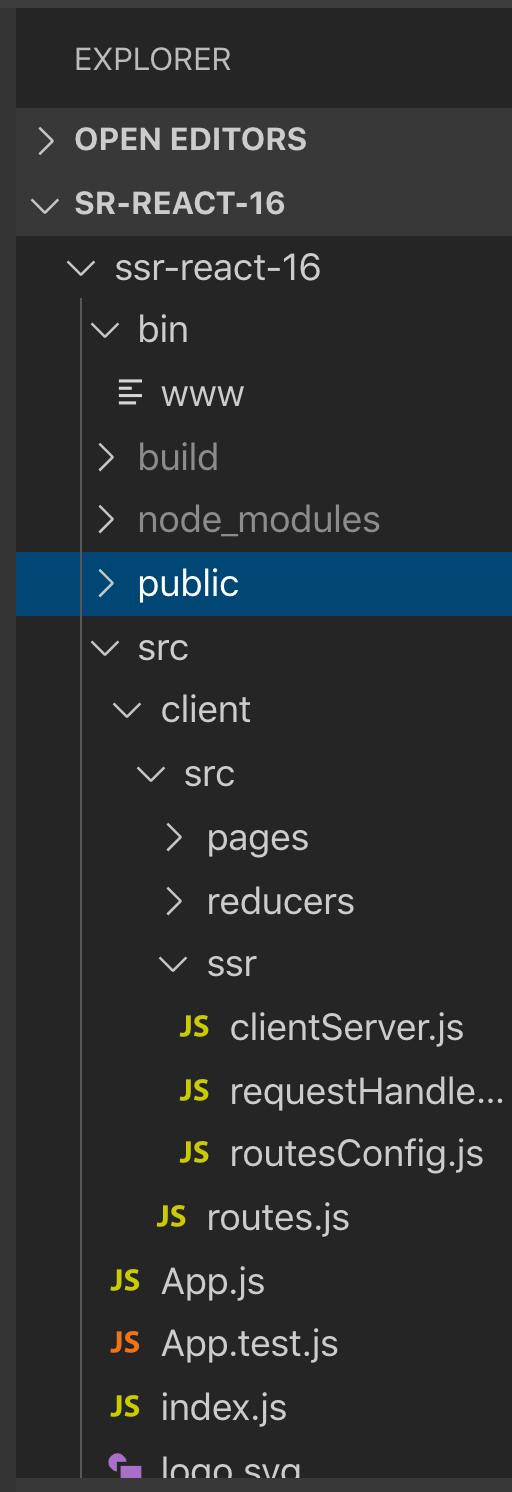
For better folder structure, I have organised as shown in the below screenshot where bin and src will falls under root directory. Paste the below code in clientServer file. clientServer is kind of server side script for our client application, it will initiate expressjs and configurations for server side script of client.

require("@babel/register")({
  presets: ["@babel/preset-env"]
});

const express = require('express');
const path = require('path');

const requestHandler = require('./requestHandler');
const app = express();

//static files nd build file reference
app.use(express.static(path.join(__dirname, '../../../../build')));
app.use(express.static(path.join(__dirname, 'public')));

app.set('view engine', 'ejs');
app.set('views', path.join(__dirname, 'public'));

//for server side rendering
app.use(requestHandler);

// catch 404 and forward to error handler
app.use((req, res, next) => {
  const err = new Error('Notdff Found');
  err.status = 404;
  next(err);
});

module.exports = app;


In the above code you can see a requestHandler file, which is very important file and will see there.

Step6: A request handler for ReactJS for server side rendering and invoking (calling) apis at server side
This step is very important for serving the requested page from server side.  All magic of serving the requested page is done in this script.  When client request for a page, it matches the path and determines whether is there any API call for this page and invokes api then updates HTML body for the respective response. Basically here its creating the react component at server side. Hence React component is fully ready with all the data for the first render itself. 
If there is no api call for a particular page, it just serves a just a static page 

[AdSense-A]
Create a file requestHandler.js Copy the below code.

'use strict';
import React from 'react';
import { Provider } from 'react-redux';
import thunk from 'redux-thunk';
import { applyMiddleware, createStore } from 'redux';
import { renderToString } from 'react-dom/server';
import { SheetsRegistry } from 'jss';
import JssProvider from 'react-jss/lib/JssProvider';
import path from 'path'
import fs from 'fs'
import {
  MuiThemeProvider,
  createMuiTheme,
  createGenerateClassName,
} from '@material-ui/core/styles';
import green from '@material-ui/core/colors/green';
import red from '@material-ui/core/colors/red';
import { StaticRouter, matchPath } from 'react-router-dom';
import DocumentMeta from 'react-document-meta';
import reducers from '../reducers/index';
import routes from '../routes';
import routesConfigs from './routesConfig';

const middleware = applyMiddleware(thunk);

function renderView(req, res, state) {

  // Create a theme instance.
  const theme = createMuiTheme({
    palette: {
      primary: green,
      accent: red,
      type: 'light',
    },
  });

  // STEP-1 CREATE A REDUX STORE ON THE SERVER
  const store = createStore(reducers, state, middleware);
  const sheetsRegistry = new SheetsRegistry();
  // Create a sheetsManager instance.
  const sheetsManager = new Map();
  const generateClassName = createGenerateClassName();
  // STEP-2 GET INITIAL STATE FROM THE STORE
  const initialState = JSON.stringify(store.getState()).replace(/<\/script/g, '<\\/script').replace(/<!--/g, '<\\!--');
  // STEP-3 IMPLEMENT REACT-ROUTER ON THE SERVER TO INTERCEPT CLIENT REQUESTs AND DEFINE WHAT TO DO WITH THEM
  const context = {};
  const reactComponent = renderToString(
    <JssProvider registry={sheetsRegistry} generateClassName={generateClassName}>
      <MuiThemeProvider theme={theme} sheetsManager={sheetsManager}>
        <Provider store={store}>
          <StaticRouter
            location={req.url}
            context={context}>
            {routes}
          </StaticRouter>
        </Provider>
      </MuiThemeProvider>
    </JssProvider>
  );
  const css = sheetsRegistry.toString()
  const reactMetaComponent = DocumentMeta.renderToStaticMarkup();
  if (context.url) {
    // can use the `context.status` that
    // we added in RedirectWithStatus
    redirect(context.status, context.url);
  } else {
    //https://crypt.codemancers.com/posts/2016-09-16-react-server-side-rendering/
    //res.status(200).render('index', { reactComponent, reactMetaComponent, initialState });
    fs.readFile(path.resolve('build/index.html'), 'utf8', (err, data) => {
      if (err) {
        return res.status(500).send('An error occurred')
      }
      const replacedData = data.replace(
        '<div id="root"></div>',
        `<div id="root">${reactComponent}</div>
        <style id="jss-server-side">${css}</style>
        <script>
          window.INITIAL_STATE = ${initialState}
        </script>`
      );
      const replacedMetaTagData = replacedData
        .replace(`<meta id="reactMetaTags"/>`,
          `${reactMetaComponent}`);
      res.send(replacedMetaTagData);
    })
  }
}

function handleRender(req, res) {
  const components = routesConfigs
    .filter(route => matchPath(req.path, route)) // filter matching paths
    .map(route => route.component); // check if components have data requirement
  let promiseObj = null;
  if (components.length > 0 && (components[0].fetchData instanceof Function)) {
    /* fetchData is the function defined in each component and make it like class 
       function and it will be called at server side
    */
    components[0]
      .fetchData(req.query)
      .then((response) => {
        renderView(req, res, response);
      })
      .catch((error) => {
        console.log('***--- handleRender error ', error);
        renderView(req, res, {});
      });
  } else {
    renderView(req, res, {});
  }
}

module.exports = handleRender;
  1. By default it will be executing a handleRender function in the above code. In the handleRender function, we read a routesConfig file which is just for keeping track of respective component for each route path.
    import LandingComponent from '../pages/landing/components/LandingComponent';
    import AboutComponent from '../pages/about/components/AboutComponent';
    export default [
      {
        path: "/",
        component: LandingComponent,
        exact: true,
      },
      {
        path: '/about',
        component: AboutComponent,
        exact: true,
      }
    ];
  2. routesConfigs will be used by requestHandler to find dynamically which component needs to be rendered for the request. It also checks for fetchData, if fetchData is defined by the component then requestHandler will invoke it which internally invokes api. Note here is all this is happening at server side not on the browser, component object is created in server and fetchData action will be invoked in server. You can see the brief description of fetchData and how to use this in the component in the next step.
  3. [AdSense-B]
  4. When renderView is called, every times it creates is own redux store and a material ui theme provider, thats why we follow this code(which is also mention in the above code snip). 
    const theme = createMuiTheme({
        palette: {
          primary: green,
          accent: red,
          type: 'light',
        },
      });
    
      // STEP-1 CREATE A REDUX STORE ON THE SERVER
      const store = createStore(reducers, state, middleware);
      const sheetsRegistry = new SheetsRegistry();
      // Create a sheetsManager instance.
      const sheetsManager = new Map();
      const generateClassName = createGenerateClassName();
  5. Next major step is reading a build/index.html file which you will get by running npm run build,
    Here we will be injecting the component created at server side into index.html.

    const replacedData = data.replace(
            '<div id="root"></div>',
            `<div id="root">${reactComponent}</div>
            <style id="jss-server-side">${css}</style>
            <script>
              window.INITIAL_STATE = ${initialState}
            </script>`
     );

    where in index.html of public folder should compulsory has this tag

    <div id="root"></div>
  6. For facebook sharing, when you share the url a image and the title and description of the page has to be displayed, for that all those content has to be in the meta tag inside the head tag, hence we need to replaced meta tag with server generated meta tag code. 
    const replacedMetaTagData = replacedData
      .replace(`<meta id="reactMetaTags"/>`,
      `${reactMetaComponent}`);

    Where in index.html of public folder, meta tag with id is should be unchanged

    <meta id="reactMetaTags"/>
  7. Finally we will serve the requested page with updated meta tags and updated html for the first rendering cycle it self. 
    res.send(replacedMetaTagData);


    Step 7

  8. Every component should define an action which will be invoked from server side script, however in server side the request handler will be a generic script and we have to dynamically invoke an action at server side, to achieve that, each component has to define an action and assign action function pointer to fetchData, fetchData is a static class variable kept in component. Check the below code snippet , fetchData is defined at AboutComponent class level and a pointer to action is assigned to it.
    AboutComponent.fetchData = fetchAboutData;
    export default connect(mapStateToProps, null)(AboutComponent);
    
  9. You can refer to the fetchAboutData action in the aboutActions.js which will make the API call to some server, for testing iI am using the JSON placeholder get API which will get the list of posts as response, refer the code below 
    import axios from 'axios';
    export const fetchAboutData = (params) => {
      return new Promise((resolve, reject) => {
        const url = 'https://jsonplaceholder.typicode.com/posts';
        axios
          .get(url)
          .then(response => {
            resolve({
              about: {
                posts: response.data
              }
            });
          })
          .catch((error) => {
            console.log('Error while fetching posts from network', error);
            reject(null);
          });
      });
    }
  10. In the positive view, it goes to then block(success block) of the axios api call, you can observe that it’s not direct resolve, its resolving a reducer named about and that contain the posts as one of the key, this set up has to be same in both client side reducer as well in axios call in order to use it component (About Component), Observe the below codes, I have shown the code snips of axios call, aboutReducer to mapStateToProps in AboutComponent,
    In axios call 

    resolve({
        about: {
           posts: response.data
        }
    });

    In about reducer 

    const INITIAL_STATE = {
    posts: []
    };

    In about component

    const mapStateToProps = (state) => {
        return {
           posts:state.about.posts
        };
    }
  11. So in the render method, you can access the posts array like this.props.posts, in the return method of render function i have written one more function which will return the list of posts(only title) and it creates a html code
    getAllPosts = () => {
       const postView = this.props.posts.map(post =>
       <li>{post.title}</li>
     );
     return postView;
    }
  12. Once the html is ready, then its in the success block of the fetchData function in the handleRender function of requestHandler file , then followed by the code it calls the renderView method along with data(html) returned from the component.

Step8 :
Update the package.json start script to point to server side rendering beginning of the file, thats www under bin directory. Now server side rendering is really ready. 

  "scripts": {
    "start": "node bin.www",

Step9 : Running project:

  1. In the requestHandler file we will be pointing to index.html inside the build folder, hence we need to generate a build from react by running the command 
    npm run build
  2. Run the start command of your script by
    npm run start

        OR

    nodemon

        OR 

    node bin/www
  3. Since we are running this project on 5000 port, run http://localhost:5000 which is just a page without requesting for API, you simply see as like below
  4. I have made one more component with calling API and printing the results on screen,  run http://localhost:5000/about . I am using an open dummy api for printing list of posts,
    Ie: https://jsonplaceholder.typicode.com/posts

The output picture is shown below

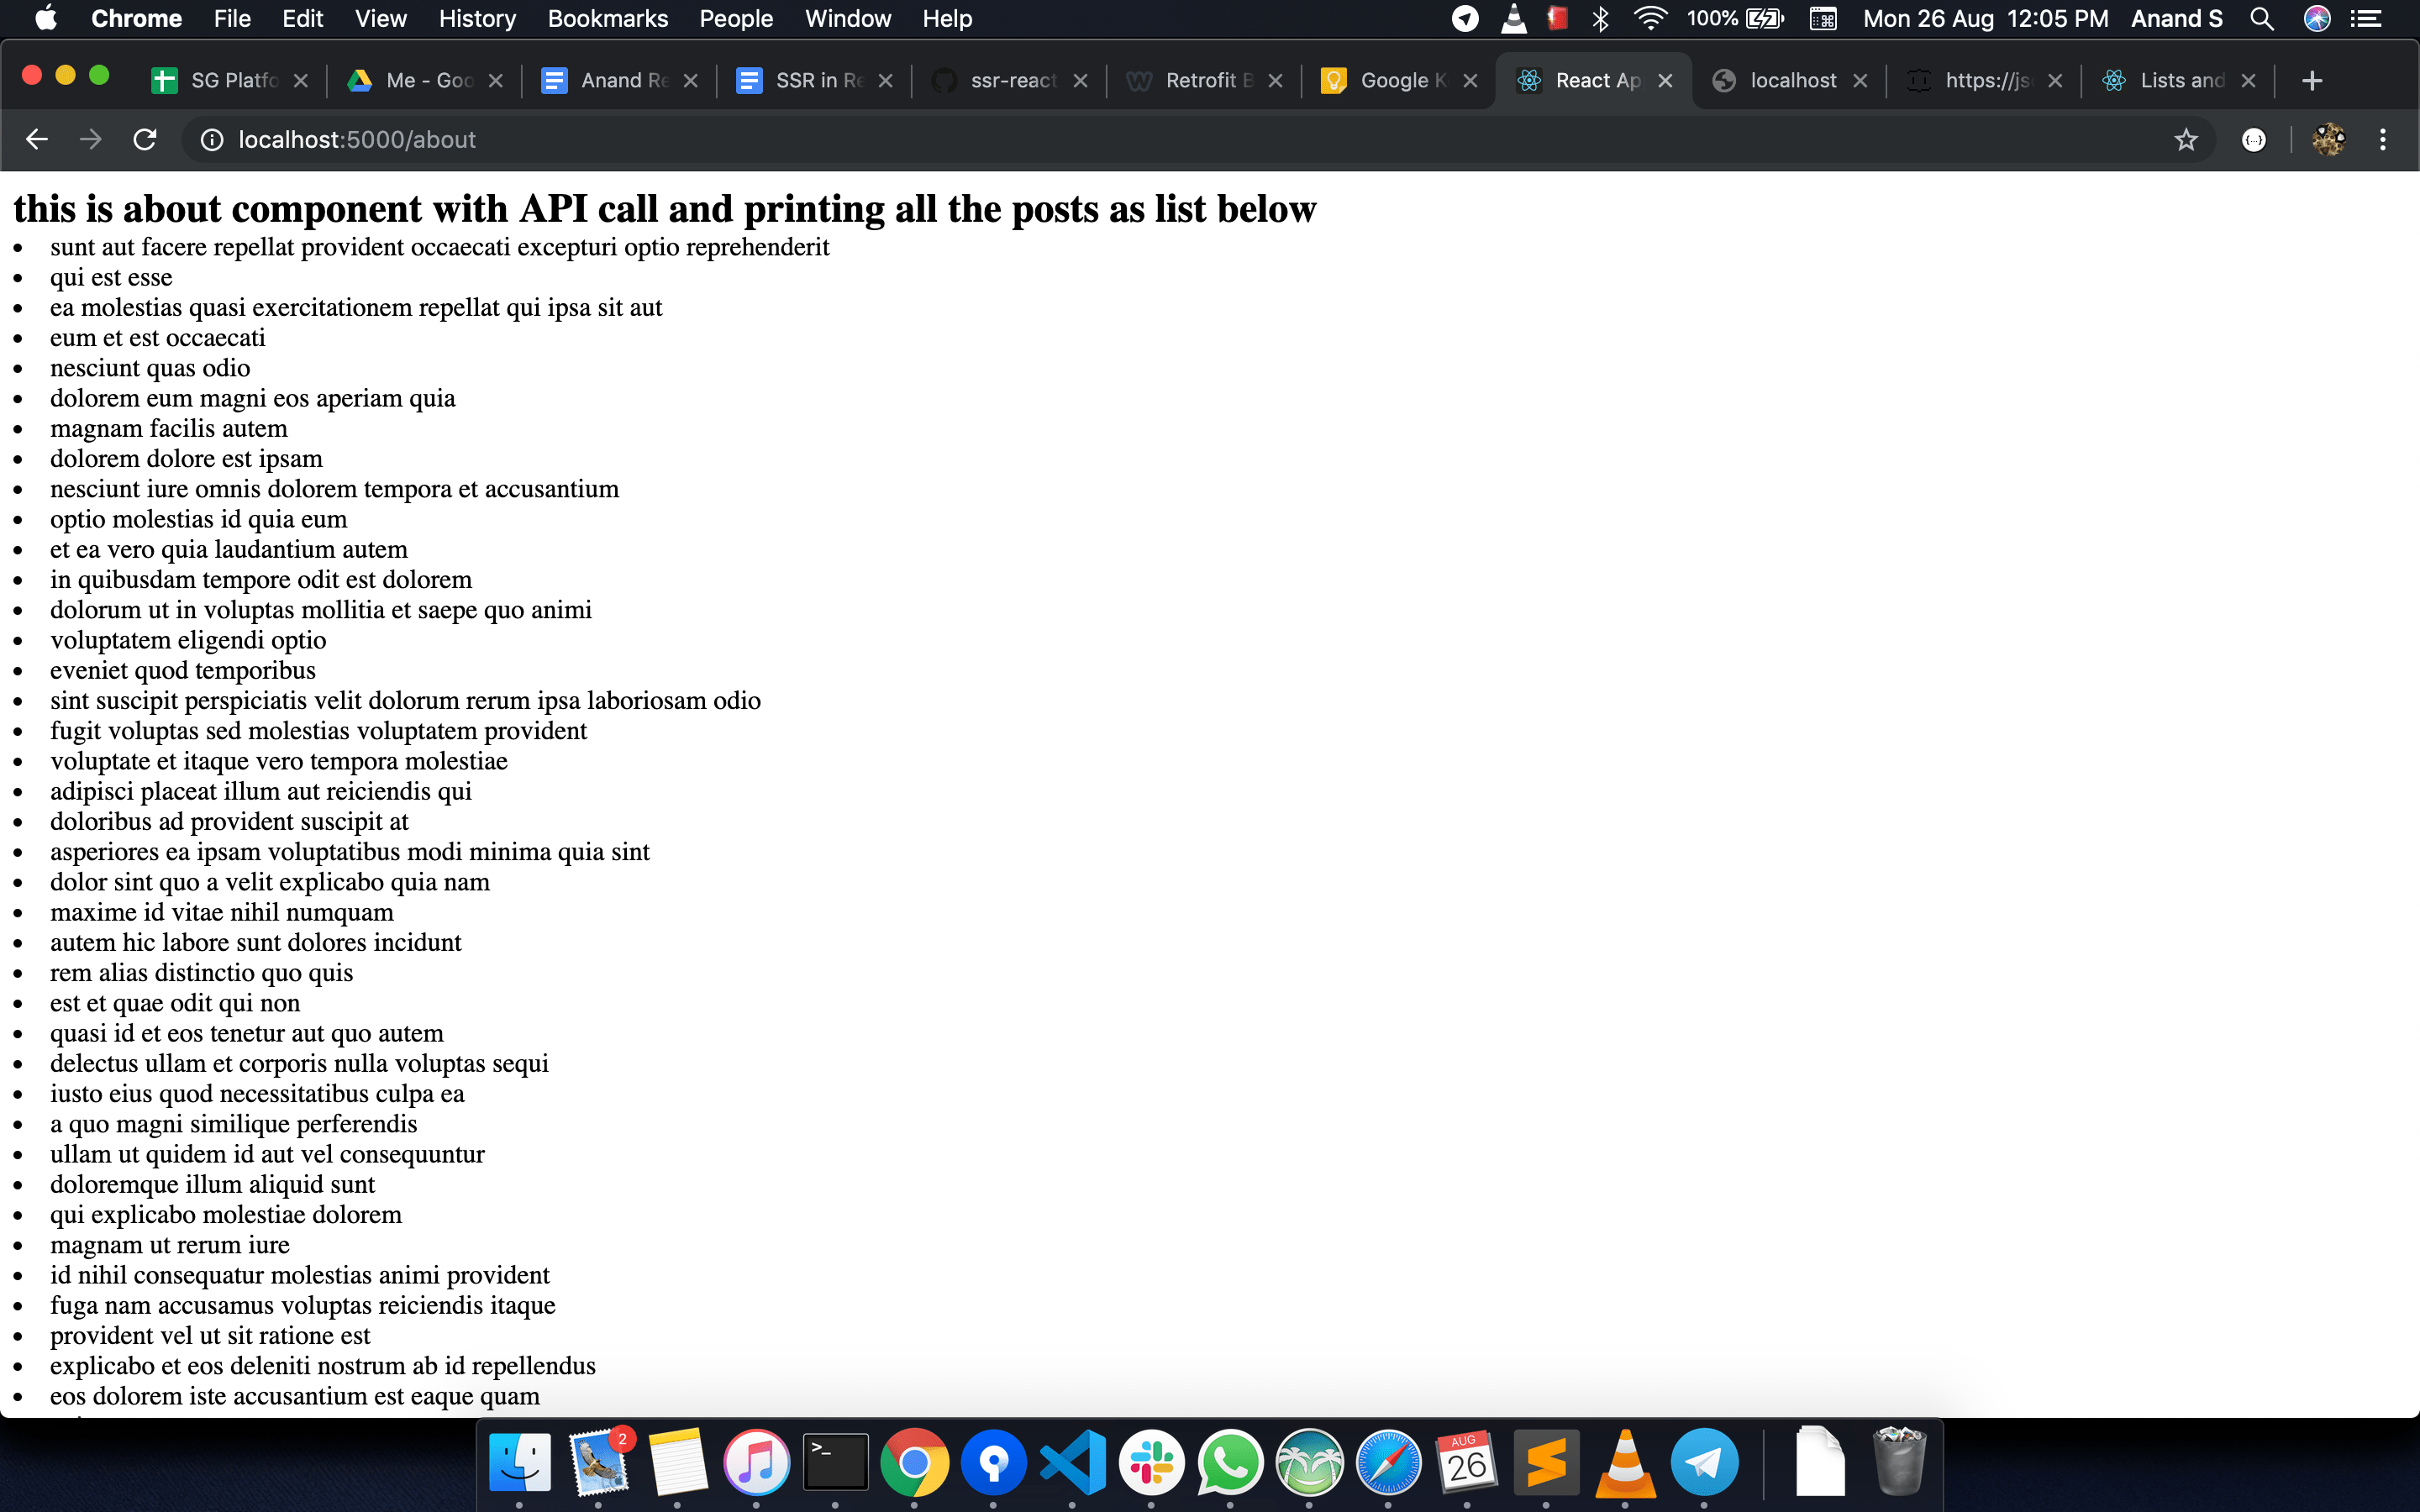
For View Tutorial on Server Side Rendering using ReactJS, Material-ui and Redux with explanation of each code snippet click here

An Example Source Code is in Github project Link : https://github.com/pilleanand/ssr-react16/tree/master/ssr-react-16

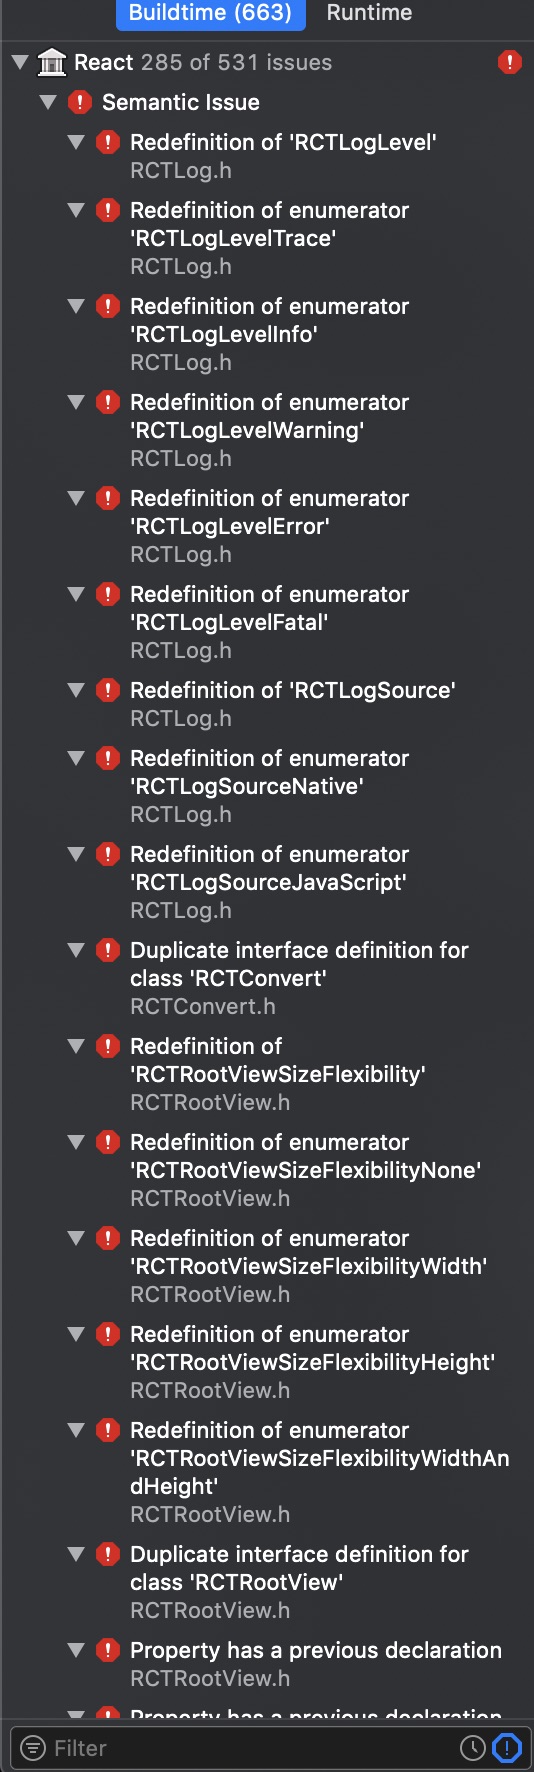
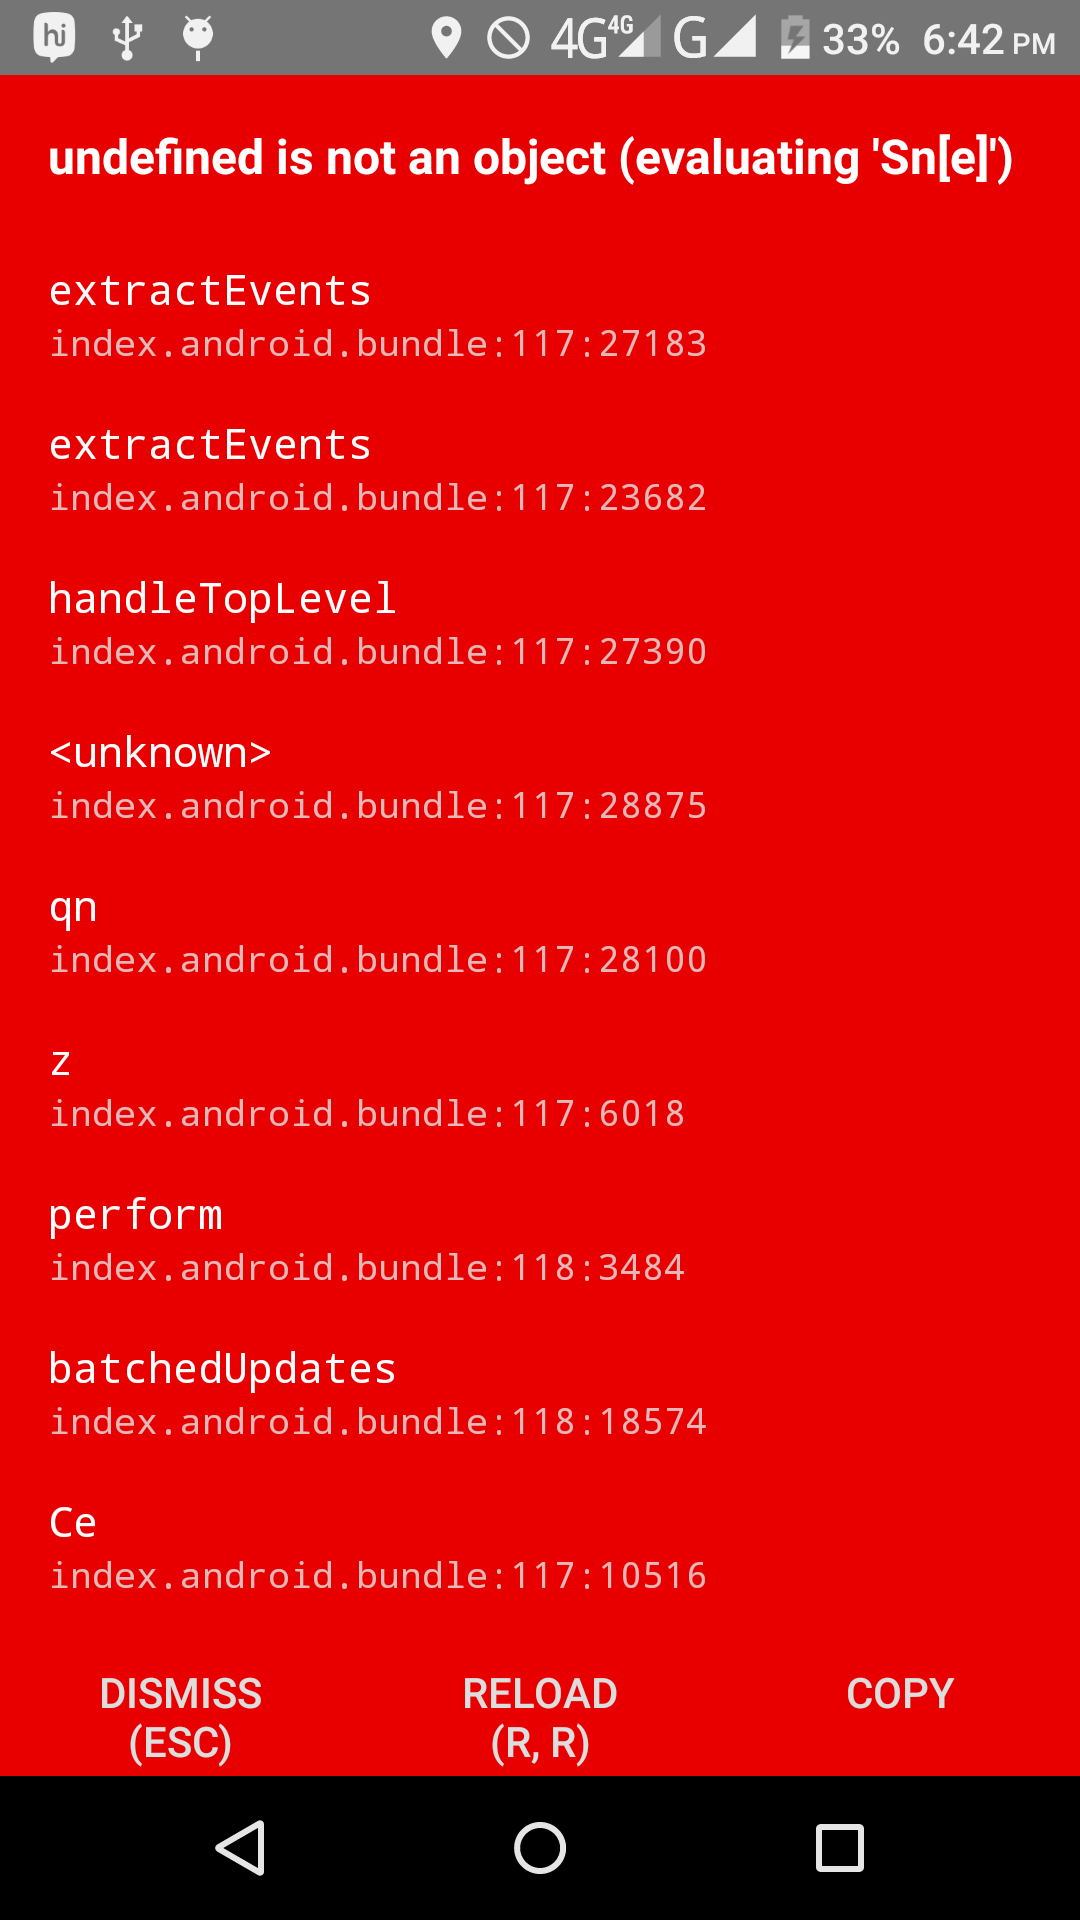
Common issues faced in React SSR Applications 

Posted by:

Anand S,

Software Engineer, Soczen Technologies Pvt Ltd,

Developer: https://sociallygood.com

ReactNative 0.59.8 project – unable to archive for for iOS while app store release & Validate Buttons is always grayed out

Recently we faced a very strange issue while releasing our ReactNative App to Apple App Store. We were unable to submit the app to iOS app store because we were failing to generate iOS Archive. XCode always generating Generic XCode Archive rather than iOS App Archive.

Since XCode was generating Generic XCode Archive, Validate button was always disabled ( grayed out). We were failing to proceed further to submit the app. After exploring the issue we came across an apple help page which was suggesting following fixes to be done for our app.

  1. Your archive contains header files.

If your app links against a static library, then your archive contains header files because the library probably uses a Headers build phase to export these files as shown in Figure 4. Headers build phases do not work correctly with static library targets when archiving in Xcode. Delete this phase, add a Copy Files build phase to your library, and use it to export your header files. See Copying Files While Building a Product for more information about adding a Copy File build phase to your project.

 2. Your archive contains static libraries or frameworks.

You must set “Skip Install” to YES to prevent your static libraries or framework from being added to your archive.

[AdSense-A]

the second step was little easy , however the first step was a big headache, a react native app will be having lot of static libraries, in that changing all header build phase to copy files build phase is a big manual work and we will get lot of compilation errors like Redenition of MethodDescriptor in NativeModule.h kind of.

Errors we see after moving header files from headers build phase to copy files build phase

Redefinition of iOS errors
You can see a stackoverflow question on this : xcode is creating generic xcode archive instead of iOS App Archive -> SO-Question

Solution:

How to release iOS app to app store when archive is troubling in XCode v11.x.x

if you are using XCode v11.x then apple has removed Application Loader from XCode Developer tools. Now the alternative to that is Apple’s Transporter Application

Again the steps are same as given below to submit your app to app store,

Essentially, after you do the Clean Build Folder, and then Build, you find the .app file in: ~/Library/Developer/Xcode/DerivedData//Build/Products/Release-iphoneos/

Create a new folder on your desktop named Payload (this name is case-sensitive)

Copy your .app file and paste the copy in this Payload folder.

Right click the folder and choose “Compress Payload”

When you save this, do not save it with the .zip extension, but instead save it with a .ipa extension.

This is now your .ipa file for your app, and you can upload this through Xcode Transporter App

How to release iOS app to app store when archive is troubling in XCode v10.x.x

We have to follow different approach to release the app.

There is another way to upload your app build to the app store: by creating an .ipa file of your app, and uploading it through Application Loader in Xcode ( just click cmd + space in your mac machine and search Application Loader ).

I don’t remember all the resources I found that helped me figure this out, but this was one of them: How to build .ipa application for react-native-ios?

Essentially, after you do the Clean Build Folder, and then Build, you find the .app file in: ~/Library/Developer/Xcode/DerivedData//Build/Products/Release-iphoneos/

Create a new folder on your desktop named Payload (this name is case-sensitive)

Copy your .app file and paste the copy in this Payload folder.

Right click the folder and choose “Compress Payload”

When you save this, do not save it with the .zip extension, but instead save it with a .ipa extension.

This is now your .ipa file for your app, and you can upload this through Xcode Application Loader.

    NOTE: Application loader asks for app specific password , kindly refer to generate app specific password -> https://www.imore.com/how-generate-app-specific-passwords-iphone-ipad-mac

[AdSense-B]

[AdSense-A]

The upload process will tell you if there is anything wrong with your build, but if there is not, it will upload to the app store and you should be able to find it in App Store Connect in a few moments.

Hope this helps you and/or others!

Thanks to Matthew Hall for answering in Stackoverflow -> https://stackoverflow.com/a/57532876/526438

ReactJS Source Map : Hiding Source Code From Browser Console

When we deploy React Apps in production environment using npm run build which will generate an optimised production build. The browser shows source code of all the components when we go to Source tab in browser inspector window. In Google chrome browser in you go to Inspector window and enter cntr+p or cmd+p (in mac) you can see all components code.

This is very important because once you release your react application to production, it will show all your production code in browser console

Solution:

To hide source code being exposed to outside world just enable GENERATE_SOURCEMAP = false in package.json file as follows.

scripts: {
"build": "GENERATE_SOURCEMAP=false react-scripts build"
}

Reference: https://github.com/facebook/create-react-app/issues/4162

ReactJS Server Side Rendering : Calling Web Services (APIs) From Server Side

A step by step guide to support server side rendering in reactjs : Calling Web Services (APIs) From Server Side

Before learning how to implement server side rendering in reactjs , let us know why server side rendering ?

Read Latest Post On Server Side Rendering with React16 + Material-UI 3.x : SSR with React16

Why Server Side Rendering ?

  1. Performance gain for initial page load : Server side rendering improves the performance of initial page load, this is because it reduces number of calls from client to server. Rather than loading empty page first, then call api , get the response then iterate the response to create ui components at client side, for server side rendering, many client-server calls will be removed and for the first render itself the client will get complete HTML with all the data filled. So the browser will just render quickly the final HTML. See the below image taken from Udemy tutorial on ReactJS, which gives complete flow diagram of client-server requires


Image Credit – Udemy Server Side Rendering React JS Flow Diagram

2. SEO friendly : Search Engine crawlers will look for server side rendering because it makes sense for crawlers to communicate with your server to get details of your page ?

3. Social Media Sharing: to get the preview of your page when some one share your page in social media like facebook, server side rendering is must, because facebook/twitter/g+ needs og tags to be filled for the first render itself

[AdSense-B]

[AdSense-A]

After knowing importance of server side rendering, let us explore how to enable it using reactjs.

Important Considerations while working on server side rendering

  1. In reactjs if you are dealing with server side rendering, then you should be aware that most of the component life cycle methods will not be called at server side. if you have to do some operations then you should either do it in component’s constructor or componentWillMount 
  2. And you should keep updating redux store from server side as well and give the updated store to client other wise client is unaware of what is changed in the store

How To Enable Server Side Rendering in React : Calling APIs from server side

Prerequisites for server side rendering in reactjs

  1. Having a nodejs middleware for request handling – if your client part is running on 8080 port and api’s are running on 8081 port, then all the requests coming to 8080 port, should go through this middleware. This is where server side api calls will be handled for every route.
  2. We need a Redux Action for API call which will just return a promise – note here is that, this should not dispatch the state, since its called from server side, the dispatch doesn’t make any sense here.
  3. Static function pointer in a component to redux action -> function pointer will be used to call action from server side
  4. Creating redux store at server side to update the data
  5. Keeping a global state and including it in view ( index.ejs or index.pug whichever view engine you use)

Let us see how to implement server side rendering with reactjs

Define request handler middleware in your app.js : this is where we call apis from backend , observe and understand how we call api for respective route. this is common middleware for all routes, but calling right API for respective route is happening due to routesConfig and static function pointer defined in respective component of routes. To understand this completely check how fetchData function is being used in function handleRender(req, res) and NewsDetailComponent

//App.js

// REQUEST HANDLER FOR SERVER-SIDE RENDERING
const requestHandler = require('./requestHandler');
// requestHandler.js

'use strict';

import React from 'react';
import { Provider } from 'react-redux';
import { createStore } from 'redux';
import { renderToString } from 'react-dom/server';
import { StaticRouter, matchPath } from 'react-router-dom';

//Reducers combiner 
import reducers from '../src/client/reducers/index';

//All the routes defined 
import routes from '../src/routes';

// Routes config which just has path and respective component mapping
import routesConfigs from '../src/routesConfig';


import DocumentMeta from 'react-document-meta';

//A Wrapper for axios where actual api call happens
import { HTTPRequestHandler } from '../src/util/commonRequires';


function renderView(req, res, state) {
    // STEP-1 CREATE A REDUX STORE ON THE SERVER
    const store = createStore(reducers, state);

  // STEP-2 GET INITIAL STATE FROM THE STORE
  const initialState = JSON.stringify(store.getState()).replace(/<\/script/g, '<\\/script').replace(/<!--/g, '<\\!--');
  // STEP-3 IMPLEMENT REACT-ROUTER ON THE SERVER TO INTERCEPT CLIENT REQUESTs AND DEFINE WHAT TO DO WITH THEM
  const context = {};
  const reactComponent = renderToString(
    <Provider store={store}>
      <StaticRouter
        location={req.url}
        context={context}>
        {routes}
      </StaticRouter>
    </Provider>
  );
  const reactMetaComponent = DocumentMeta.renderToStaticMarkup();

  if (context.url) {
    // can use the `context.status` that
    // we added in RedirectWithStatus
    redirect(context.status, context.url);
  } else {
    //https://crypt.codemancers.com/posts/2016-09-16-react-server-side-rendering/
    res.status(200).render('index', { reactComponent, reactMetaComponent, initialState });
  }
}
function handleRender(req, res) {
  const components = routesConfigs
    .filter( route => matchPath( req.path, route ) ) // filter matching paths
    .map( route => route.component ); // check if components have data requirement
    let promiseObj = null;    
    if (components.length > 0 && (components[0].fetchData instanceof Function)) {
      components[0]
      .fetchData(req.query)
      .then((response) => {
        //console.log('***--- response ', response);
          renderView(req, res, response);
      })
      .catch((error) => {
        console.log('***--- error ', error);
        renderView(req, res, {});
      });
    } else {
      renderView(req, res, {});
    }
}

module.exports = handleRender;

Check the view part and the most important part because this is where the global redux stare is being shared by client and server
// View Part : index.ejs 
// put below lines of code within the <body> tag

<DIV class = 'appStyle' id="app"><%-reactComponent-%></DIV>
<script>window.INITIAL_STATE=<%- initialState -%></script>


Now let us define a component which embed all the routes

[AdSense-A]

// PrimaryLayout.js

import React from 'react';
import { Route, Switch } from 'react-router-dom';
import DocumentMeta from 'react-document-meta';

import MenuComponent from '../components/common/elements/menu';
import NewsDetailComponent from '../components/pages/NewsDetailComponent';

import {
  NEWS
} from '../../constants';


class PrimaryLayout extends React.Component {
  render() {
    const layoutPath = this.props.match.path;
    return (
      <div style={{ paddingTop: 80 }}>
        <MenuComponent />
        <main>
          <Switch>
            <Route exact path={layoutPath} component={LandingPageComponent} />
            <Route exact path={`${layoutPath}${NEWS}/:newsId`} component={NewsDetailComponent} />
          </Switch>
        </main>
      </div>
    );
  }
}

export default PrimaryLayout;


Now let us define all routes

//routes.js

'use strict';
// REACT
import React from 'react';

// REACT-ROUTER
//import {Router, Route, IndexRoute, browserHistory} from 'react-router';
import { Route, Switch } from 'react-router-dom';

import getMuiTheme from 'material-ui/styles/getMuiTheme';
import { MuiThemeProvider } from 'material-ui/styles';

import PrimaryLayout from './client/containers/PrimaryLayout';


// RETRIVES COMPONENTS BASED ON STATUS
const Status = function ({ code, children }) {
  return (
        <Route
          render={function ({ staticContext }) {
            if (staticContext) {
              staticContext.status = code;
            }
            return children;
          }}
        />
    );
};

//NOT-FOUND COMPONENT
const NotFound = function () {
    return (
      <Status code={404}>
        <div>
          <h2> Sorry, can’t find this page</h2>
        </div>
      </Status>
    );
};

// CLIENT-SERVER SHARED ROUTES
const routes = (
  <MuiThemeProvider muiTheme={getMuiTheme('lightBaseTheme')}>
      <div className='appStyle'>
          {/*
            switch required to handle inclusive rendering,
            example : two different paths like /about /:userName both
            will render both the components switch handles such requests by
            inclusively rendering the specific component
         */}
          <Switch>
            <Route path="/notfound" component={NotFound} />
            <Route path="/" component={PrimaryLayout} />
          </Switch>
      </div>
    </MuiThemeProvider>
    );

export default routes;


and let us use the routes

// client.js which defines routes 

'use strict';
// REACT
import React from 'react';
import { render } from 'react-dom';
import { Provider } from 'react-redux';
// REACT-ROUTER
import { BrowserRouter } from 'react-router-dom';
//import {Router, Route, IndexRoute, browserHistory} from 'react-router';

import { applyMiddleware, createStore } from 'redux';
import logger from 'redux-logger';
import thunk from 'redux-thunk';
import routes from '../routes';


// IMPORT COMBINED REDUCERS
import reducers from './reducers/index';
// STEP 1 create the store
const middleware = applyMiddleware(thunk, logger);
// WE WILL PASS INITIAL STATE FROM SERVER STORE
const initialState = window.INITIAL_STATE;
const store = createStore(reducers, initialState, middleware);

const Routes = (
  <Provider store={store}>
    {/*
      Provider
      Makes the Redux store available to the connect() calls in the component hierarchy below.
      Normally, you can’t use connect() without wrapping a parent or ancestor
      component in
   */}
    {/*
      A <Router> that uses the HTML5 history API (pushState, replaceState and the popstate event)
      to keep your UI in sync with the URL.
    */}
    <BrowserRouter>
      {routes}
    </BrowserRouter>
  </Provider>
);

render(
  Routes, document.getElementById('app')
);


New Let us define our component

'use strict';
import React from 'react';
import {connect} from 'react-redux';

import { fetchNews, fetchNewsData } from '../actions/newsActions';

 class NewsDetailComponent extends React.Component {
    constructor(props) {
      super(props);
    }
    
    componentDidMount() {
        this.props.fetchNews(this.props.match.params.eventId);
    }
    render() {
        return(
            <div className='container-fluid'>
                <section>
                    <div className='row'>
                        <div className='col-lg-2 col-md-2 col-sm-2 col-xs-1'></div>
                        <div className='col-lg-8 col-md-8 col-sm-8 col-xs-10'>
                           {/* here your news component */} 
                        </div>
                        <div className='col-lg-2 col-md-2 col-sm-2 col-xs-1'></div>
                    </div>
                </section>
            </div>
        );
    }
 }


function mapStateToProps(state) {
    return {
        newsInfo: state.newsInfo.newsInfo
    };
}
NewsDetailComponent.fetchData = fetchNewsData;
export default connect(mapStateToProps, {
    fetchNews,
})(NewsDetailComponent);

And redux action which calls API

export const fetchNewsData = (params) => {
    return new Promise((resolve, reject) => {
        const newsDetailsUrl = `${NEWS_API_PATH}/${params.newsId}?newsId=${newsId}`;
        HTTPRequestHandler
        .get(newsDetailsUrl)
        .then((apiResponse) => {
            / * 
                Return the updated state so that we can update redux state 
                from server side
            */
            resolve({
                    news: { 
                        news: { 
                            newsDetails: apiResponse.data.newsDetails,
                        } 
                    }
                  });
            
        })
        .catch((apiError) => {
            console.log('-- 2 api call fail--- ', apiError);
            reject(null);
        });
    });
}


[AdSense-B]

Rather than explaining each line of code written, I would like to help you to understand it by taking your attention on important aspects 

  1. to understand how the redux state is managed from backend and available for front end ( UI component, NewsDetailComponent) check how initialState and window.INITIAL_STATE are being used 
  2. to understand how api is called in a common middleware requestHandler at server side for respective page please check how routesConfig , fetchData, fetchNewsData are being used 
  3. to understand how redux store is managed even at server side and synched with client side which is most important – other wise client is unaware of what happened at server side – check function renderView(req, res, state) (server side) and client.js (client side) both are creating redux store but the data from server is being used by client using a global store object.

References : 

https://medium.freecodecamp.org/demystifying-reacts-server-side-render-de335d408fe4

http://sujinc.com/2018/06/20/all-about-sujinc-com-part-1-reactjs-ssr/


React Native Crash Undefined is not an object (Evaluating ‘Sn[e]’)

React Native Crash Undefined is not an object (Evaluating ‘Sn[e]’)

Any one facing react native build issue? I am trying to generate debug build but its crashing when the app is launched . The exception has no useful information. I was facing the same issue with

sudo react-native run-android


But that got resolved after upgrading RN from 0.48 to 0.55(latest Stable Version). But the crash remain same for the apk generated using

sudo gradlew assembleDebug

The crash is similar to https://github.com/facebook/react-native/issues/16745

please see screenshot

ReactNative Undefined Not an object evaluating

Solution: Generating React Native Android Release and Debug Builds

1. If any one facing issue with generating ReactNative android build then do not forget to follow below steps

2. Update your key store details as given here

3. Then explicitly bundle the assets using below command

react-native bundle --platform android --dev false --entry-file index.android.js --bundle-output android/app/src/main/assets/index.android.bundle --assets-dest android/app/src/main/res/ 

4. Generate the build using gradle

cd android && ./gradlew assembleRelease

Note: for release build I am facing another issue as follows

Error in Release build :

FAILURE: Build failed with an exception.

* What went wrong:
Failed to capture snapshot of input files for task ‘bundleReleaseJsAndAssets’ property ‘$1’ during up-to-date check.
> Failed to create MD5 hash for file ‘/Development/SourceCode/MobApp/testApp/root-state/sock’.

* Try:
Run with –stacktrace option to get the stack trace. Run with –info or –debug option to get more log output.

* Get more help at https://help.gradle.org

BUILD FAILED in 2s

To generate debug build

cd android && ./gradlew assembleDebug


Credits : SO Post

React Native react-navigation props.navigation.navigate(“DrawerOpen”) doesn’t work

React Native react-navigation props.navigation.navigate(“DrawerOpen”) doesn’t work

If you are using react-navigation version “1.0.0-beta.11” then the following apis works fine

props.navigation.navigate('DrawerOpen'); // open drawer
props.navigation.navigate('DrawerClose'); // close drawer


If you are using react-navigation version “2.0.0-rc.9” then following apis works fine

props.navigation.openDrawer();
props.navigation.closeDrawer();
props.navigation.toggleDrawer();


Read More About React-Navigation Package : react-navigation performance issues

Typical React Native Navigation issues people facing for this

navigation.navigate(‘DrawerOpen’) doesn’t work

DrawerToggle not working on Android #2760

Drawer Menu doesn’t work in react-native

React Native react-navigation navigation.navigate.reset doesn’t work

React Native react-navigation navigation.navigate.reset doesn’t work

1. If you are using react-navigation version “1.0.0-beta.11” then kindly use the below code to reset navigation stack

const resetAction = NavigationActions.reset({
    index: 0,
    key: null,
    actions: [ NavigationActions.navigate({ routeName: 'Home' }) ],
  });
  navigation.dispatch(resetAction);

//Note key: null is very important here.

Reference: github post by react navigation contributor 
2. If you are using react-navigation(v2) version “2.0.0-rc.9” then kindly use the below code to reset navigation stack

const resetAction = StackActions.reset({
    index: 0,
    key: null,
    actions: [ NavigationActions.navigate({ routeName: 'DrawerStack' }) ],
  });
  navigation.dispatch(resetAction);


Read More On React-Navigation : Typical issues of react-navigation

React Native react-navigation performance issue: Optimising performance

React Native react-navigation performance issue: Optimising performance

Rather than writing a detailed article here, I would like to point out very few performance tuning technique with respect to React Native Navigation using react-navigation package.

1. Few check you have to do before blaming react-navigation library, Check whether are you calling any location api to fetch current location.

If you are fetching current location on component mount or will mount then consider my suggestion , fetch the current location on launch of app and save the location, then onwards use the saved location rather than fetching current location every time.

Find the code here to do so

import { AsyncStorage } from 'react-native';

let instance = null;
class SharedPreferences {

  constructor() {
    if (!instance) {
      instance = this;
    }
    return instance;
  }
  async put(key, val) {
    try {
      await AsyncStorage.setItem(key, val);
    } catch (error) {
      console.error('Unable to save in preferences: ', error);
    }
  }

  async get(key) {
    try {
      return await AsyncStorage.getItem(key);
    } catch (error) {
      console.error('Unable to get from preferences: ', error);
    }
  }

   getMultiple(keys, callback) {
     AsyncStorage.multiGet(keys, (err, stores) => {
       if (!err) {
         const keyVals = {};
         stores.map((result, i, store) => {
           keyVals[`${result[0]}`] = result[1];
         });
         callback(keyVals);
       } else {
         callback([]);
       }
     });
  }
}

const sharedPreference = new SharedPreferences();

export const SHARED_PREFERENCE = {
  accessor: sharedPreference
};
'use strict';

import { SHARED_PREFERENCE } from './SharedPreferences';
import { SHARED_PREFERENCE_KEYS } from './AppConstants';

const defaultLocation = {
  coords: {
    latitude: 12.9833,
    longitude: 77.5833
  }
};

export function getCurrentLocation(navigator, callback) {
  SHARED_PREFERENCE.accessor.get(SHARED_PREFERENCE_KEYS.LAST_SAVED_LOCATION_ID)
  .then(savedLocation => {
    if (savedLocation !== null && savedLocation !== undefined) {
      const location = JSON.parse(savedLocation);
      console.log('Returning Saved Location');
      callback(location);
    } else {
      navigator
      .geolocation.getCurrentPosition(
        (location) => {
          console.log(`Saving Device Current Location due to failed save in last try:
             ${JSON.stringify(location)}`);
          SHARED_PREFERENCE
          .accessor
          .put(LAST_SAVED_LOCATION_ID, JSON.stringify(location));
          callback(location);
        }, (geoError) => {
          callback(defaultLocation);
        },
        { enableHighAccuracy: true, timeout: 20000, maximumAge: 1000 });
    }
  })
  .catch((locationError) => {
    callback(defaultLocation);
  });
}

export function saveCurrentLocation(navigator) {
  navigator
  .geolocation.getCurrentPosition(
    (location) => {
      console.log(`Saving Device Current Location: ${JSON.stringify(location)}`);
      SHARED_PREFERENCE
      .accessor
      .put(LAST_SAVED_LOCATION_ID, JSON.stringify(location));
    }, (geoError) => {
      console.log(`Save Location Failed. ${JSON.stringify(geoError)}`);
    },
    { enableHighAccuracy: true, timeout: 20000, maximumAge: 1000 });
}

2. Use Stateless components than ReactComponents wherever it is possible : Read more about StateLessComponents

3. Upgrade react-navigation package from “1.0.0-beta.11” to “2.0.0-rc.9” : This will boost the performance of react-navigation .

React Native Social Authentication Using Firebase: Google+ and Facebook Signin, Signup – A Step by Step Guide

React Native Social Authentication Using Firebase: Google+ and Facebook Signin, Signup – A Step by Step Guide

One has to go through following steps to enable social authentication in their react native mobile apps. In this tutorial we will see how to enable react native social login for android applications.

React Native Google Plus Signup/Signin Using Firebase Authentication

1. Create Project in Google Cloud Platform : Try free trail 

2. Enable Google+ API for your project and generate API Key

GCloudApiKey1
GCloudApiKey1

3. Set YourSHA-1 key and package name (as given in AndroidManifest.xml ) of your android project

To generate your own SHA-1 use the command -> keytool -list -v -keystore mystore.keystore

NOTE : If Your build is debug build then theSHA-1 generated with above command won’t work, kindly check your adb logs carefully, theSHA-1 being used by your android debug build will be logged in the device log. To check device log run the below command from your /Users/<YourSystemUserName>/Library/Android/sdk/platform-tools —> adb logcat

APIKey&SHA1
APIKey&SHA1

4. Import the same project in firebase

ImportProjectFirebase

5. Setup android project in your firebase project, then setup authentication methods being used in your app.

firebaseAuthMethods
firebaseAuthMethods

6. Then setup sameSHA-1 Key for your firebase project: Navigate to Project setting from side bar and click on general , select android app and set SHA-1 key

NOTE: Once SHA-1 is setup, download google-services.json file in the same page. and keep the file under your android project director app folder /ReactNativeProjectFolder/android/app

[AdSense-B]

[AdSense-A]

Till this your google cloud and firebase setup is done, now we have to do lot of changes in code.

7. add ‘react-native-google-signin’ and ‘firebase’ modules

npm install react-native-google-signin –save

npm install firebase –save

8. Add dependency in your /app/bundle.gradle

Note : in below code those excludes are most important, or else you will encounter strange linking errors.

implementation project(':react-native-google-signin')

if your app is using some other dependencies like react-native-maps or react-native-social-share then do below changes as well

implementation(project(":react-native-google-signin")){
    exclude group: "com.google.android.gms" // very important
}
compile(project(':react-native-maps')) {
      exclude group: 'com.google.android.gms', module: 'play-services-base'
      exclude group: 'com.google.android.gms', module: 'play-services-maps'
    }
implementation 'com.google.android.gms:play-services-base:11.+'
implementation 'com.google.android.gms:play-services-maps:11.+'

9. your android/bundle.gradle file should look as follows

// Top-level build file where you can add configuration options common to all sub-projects/modules.

buildscript {
    repositories {
        google()
        jcenter()
    }
    dependencies {
        classpath 'com.android.tools.build:gradle:3.0.1'
        classpath 'com.google.gms:google-services:3.0.0' // <--- add this
        // NOTE: Do not place your application dependencies here; they belong
        // in the individual module build.gradle files
    }
}

allprojects {
    repositories {
        mavenLocal()
        jcenter()
        maven {
            // All of React Native (JS, Obj-C sources, Android binaries) is installed from npm
            url "$rootDir/../node_modules/react-native/android"
        }
    }
}

ext {
    compileSdkVersion   = 23
    targetSdkVersion    = 23
    buildToolsVersion   = "23.0.1"
    googlePlayServicesVersion = "10.2.4"
    androidMapsUtilsVersion = "0.5+"
}


10. run below commands

npm install

react-native link

11. Once you run react native link – check android/settings.gradle file , cross check that there should not be duplicate lines of content.

So far we have done project level configurations, now let us see code changes

[AdSense-A]

12. React Native Google sign-in/sign-up using firebase code

import { GoogleSignin } from 'react-native-google-signin';
import firebase from 'firebase';

function googleAuthConfig(successCallback, failureCallback) {
  /*
   Web Client id 
      Get the client_id from Google-services.json file, in that file under 
    "client": [
       "oauth_client": [
        {
          "client_id": "", //This you have to use as webClientId and the same for android
          "client_type": 3
        }
       
  */
  GoogleSignin.configure({
    iosClientId: CLIENT_IDS.GOOGLE_IOS_CLIENT_ID,
    webClientId: '',
    hostedDomain: '', // specifies a hosted domain restriction
    forceConsentPrompt: true, // [Android] if you want to show the authorization prompt at each login
    accountName: '' // [Android] specifies an account name on the device that should be used
  })
  .then(() => {
    console.log('Google Config Success');
    successCallback();
  })
  .catch((err) => {
    console.log('Google Config Error');
    failureCallback(err);
  });
}


function googleSignin() {
  googleAuthConfig(() => {
      GoogleSignin.signIn()
      .then((user) => {
        const { accessToken } = user;
          var credentials = firebase.auth.GoogleAuthProvider.credential(null, accessToken);
          firebase.auth().signInWithCredential(credentials)
          .then((firebaseResult) => {
            loginToSG(dispatch, firebaseResult, props, 'Google', registerCallback);
          })
          .catch(error => console.log('error while checking with firebase', error));
      })
      .catch((err) => {
        console.log(err);
        });
    }, (googleConfigErr) => {
        console.log(googleConfigErr);
    });
}

13. Finally the most important step is -> once do npm cache clean, delete your existing app from device, delete build folders then run the app 

react-native run-android 

React Native: Ejecting Expo To Regular React Native Project.

React Native: Ejecting Expo To Regular React Native Project.

Before explaining the steps for eject from expo, I would like to thank the expo community who has done really a great job, it was nightmare for us to start with ReactNative initially without expo. Expo has done remarkable job and simplified the whole process to us. So we should thank expo community for that. But Expo has come up with its own limitations, it is really difficult to go forward with those limitations, hence ejecting from expo is must.

Follow below steps and find the issues listed in each step and the solutions for the issues faced during eject process. Follow all the below steps

1. npm run eject

? How would you like to eject from create-react-native-app? (Use arrow keys)
❯ React Native: I'd like a regular React Native project. 
  ExpoKit: I'll create or log in with an Expo account to use React Native and the Expo SDK. 
  Cancel: I'll continue with my current project structure. 
Choose 1st option

2. then run the command

react-native run-android
Building and installing the app on the device (cd android && ./gradlew installDebug)…

Problem:
FAILURE: Build failed with an exception.

* What went wrong:
A problem occurred configuring project ‘:app’.
> SDK location not found. Define location with sdk.dir in the local.properties file or with an ANDROID_HOME environment variable.

* Try:
Run with –stacktrace option to get the stack trace. Run with –info or –debug option to get more log output.

BUILD FAILED

Total time: 45.174 secs
Could not install the app on the device, read the error above for details.
Make sure you have an Android emulator running or a device connected and have
set up your Android development environment:
https://facebook.github.io/react-native/docs/android-setup.html

Solution:
Create local.properties in the andoid project folder and save the below content in that
sdk.dir = /Users/USERNAME/Library/Android/sdk
USERNAME: USERNAME should be your maachine user name

3. run the command

$ sudo react-native run-android

Problem:

FAILURE: Build failed with an exception.

* What went wrong:
Execution failed for task ‘:app:installDebug’.
> com.android.builder.testing.api.DeviceException: No connected devices!

* Try:
Run with –stacktrace option to get the stack trace. Run with –info or –debug option to get more log output.

BUILD FAILED

Total time: 6.945 secs
Could not install the app on the device, read the error above for details.
Make sure you have an Android emulator running or a device connected and have
set up your Android development environment:
https://facebook.github.io/react-native/docs/android-setup.html

   Solution : Use proper cable and connect your device, enable debug mode in your android device. this is problem with some devices, do not spend time on this, because you will face bigger problems later 🙂 so either change the device or try with different cable.

4. Problem
com.android.ddmlib.InstallException: Failed to install all
at com.android.ddmlib.SplitApkInstaller.install(SplitApkInstaller.java:89)
at com.android.ddmlib.Device.installPackages(Device.java:904)
at com.android.builder.testing.ConnectedDevice.installPackages(ConnectedDevice.java:137)
at com.android.build.gradle.internal.tasks.InstallVariantTask.install(InstallVariantTask.java:134)
at sun.reflect.NativeMethodAccessorImpl.invoke0(Native Method)
at sun.reflect.NativeMethodAccessorImpl.invoke(NativeMethodAccessorImpl.java:62)
at sun.reflect.DelegatingMethodAccessorImpl.invoke(DelegatingMethodAccessorImpl.java:43)
at java.lang.reflect.Method.invoke(Method.java:498)
at org.gradle.internal.reflect.JavaMethod.invoke(JavaMethod.java:75)
at org.gradle.api.internal.project.taskfactory.AnnotationProcessingTaskFactory$StandardTaskAction.doExecute(AnnotationProcessingTaskFactory.java:228)
at org.gradle.api.internal.project.taskfactory.AnnotationProcessingTaskFactory$StandardTaskAction.execute(AnnotationProcessingTaskFactory.java:221)
at org.gradle.api.internal.project.taskfactory.AnnotationProcessingTaskFactory$StandardTaskAction.execute(AnnotationProcessingTaskFactory.java:210)
at org.gradle.api.internal.AbstractTask$TaskActionWrapper.execute(AbstractTask.java:621)
at org.gradle.api.internal.AbstractTask$TaskActionWrapper.execute(AbstractTask.java:604)
at org.gradle.api.internal.tasks.execution.ExecuteActionsTaskExecuter.executeAction(ExecuteActionsTaskExecuter.java:80)
at org.gradle.api.internal.tasks.execution.ExecuteActionsTaskExecuter.executeActions(ExecuteActionsTaskExecuter.java:61)
at org.gradle.api.internal.tasks.execution.ExecuteActionsTaskExecuter.execute(ExecuteActionsTaskExecuter.java:46)
at org.gradle.api.internal.tasks.execution.PostExecutionAnalysisTaskExecuter.execute(PostExecutionAnalysisTaskExecuter.java:35)
at org.gradle.api.internal.tasks.execution.SkipUpToDateTaskExecuter.execute(SkipUpToDateTaskExecuter.java:66)
at org.gradle.api.internal.tasks.execution.ValidatingTaskExecuter.execute(ValidatingTaskExecuter.java:58)
at org.gradle.api.internal.tasks.execution.SkipEmptySourceFilesTaskExecuter.execute(SkipEmptySourceFilesTaskExecuter.java:52)
at org.gradle.api.internal.tasks.execution.SkipTaskWithNoActionsExecuter.execute(SkipTaskWithNoActionsExecuter.java:52)
at org.gradle.api.internal.tasks.execution.SkipOnlyIfTaskExecuter.execute(SkipOnlyIfTaskExecuter.java:53)
at org.gradle.api.internal.tasks.execution.ExecuteAtMostOnceTaskExecuter.execute(ExecuteAtMostOnceTaskExecuter.java:43)
at org.gradle.execution.taskgraph.DefaultTaskGraphExecuter$EventFiringTaskWorker.execute(DefaultTaskGraphExecuter.java:203)
at org.gradle.execution.taskgraph.DefaultTaskGraphExecuter$EventFiringTaskWorker.execute(DefaultTaskGraphExecuter.java:185)
at org.gradle.execution.taskgraph.AbstractTaskPlanExecutor$TaskExecutorWorker.processTask(AbstractTaskPlanExecutor.java:66)
at org.gradle.execution.taskgraph.AbstractTaskPlanExecutor$TaskExecutorWorker.run(AbstractTaskPlanExecutor.java:50)
at org.gradle.execution.taskgraph.DefaultTaskPlanExecutor.process(DefaultTaskPlanExecutor.java:25)
at org.gradle.execution.taskgraph.DefaultTaskGraphExecuter.execute(DefaultTaskGraphExecuter.java:110)
at org.gradle.execution.SelectedTaskExecutionAction.execute(SelectedTaskExecutionAction.java:37)
at org.gradle.execution.DefaultBuildExecuter.execute(DefaultBuildExecuter.java:37)
at org.gradle.execution.DefaultBuildExecuter.access$000(DefaultBuildExecuter.java:23)
at org.gradle.execution.DefaultBuildExecuter$1.proceed(DefaultBuildExecuter.java:43)
at org.gradle.execution.DryRunBuildExecutionAction.execute(DryRunBuildExecutionAction.java:32)
at org.gradle.execution.DefaultBuildExecuter.execute(DefaultBuildExecuter.java:37)
at org.gradle.execution.DefaultBuildExecuter.execute(DefaultBuildExecuter.java:30)
at org.gradle.initialization.DefaultGradleLauncher$4.run(DefaultGradleLauncher.java:153)
at org.gradle.internal.Factories$1.create(Factories.java:22)
at org.gradle.internal.progress.DefaultBuildOperationExecutor.run(DefaultBuildOperationExecutor.java:91)
at org.gradle.internal.progress.DefaultBuildOperationExecutor.run(DefaultBuildOperationExecutor.java:53)
at org.gradle.initialization.DefaultGradleLauncher.doBuildStages(DefaultGradleLauncher.java:150)
at org.gradle.initialization.DefaultGradleLauncher.access$200(DefaultGradleLauncher.java:32)
at org.gradle.initialization.DefaultGradleLauncher$1.create(DefaultGradleLauncher.java:98)
at org.gradle.initialization.DefaultGradleLauncher$1.create(DefaultGradleLauncher.java:92)
at org.gradle.internal.progress.DefaultBuildOperationExecutor.run(DefaultBuildOperationExecutor.java:91)
at org.gradle.internal.progress.DefaultBuildOperationExecutor.run(DefaultBuildOperationExecutor.java:63)
at org.gradle.initialization.DefaultGradleLauncher.doBuild(DefaultGradleLauncher.java:92)
at org.gradle.initialization.DefaultGradleLauncher.run(DefaultGradleLauncher.java:83)
at org.gradle.launcher.exec.InProcessBuildActionExecuter$DefaultBuildController.run(InProcessBuildActionExecuter.java:99)
at org.gradle.tooling.internal.provider.ExecuteBuildActionRunner.run(ExecuteBuildActionRunner.java:28)
at org.gradle.launcher.exec.ChainingBuildActionRunner.run(ChainingBuildActionRunner.java:35)
at org.gradle.launcher.exec.InProcessBuildActionExecuter.execute(InProcessBuildActionExecuter.java:48)
at org.gradle.launcher.exec.InProcessBuildActionExecuter.execute(InProcessBuildActionExecuter.java:30)
at org.gradle.launcher.exec.ContinuousBuildActionExecuter.execute(ContinuousBuildActionExecuter.java:81)
at org.gradle.launcher.exec.ContinuousBuildActionExecuter.execute(ContinuousBuildActionExecuter.java:46)
at org.gradle.launcher.exec.DaemonUsageSuggestingBuildActionExecuter.execute(DaemonUsageSuggestingBuildActionExecuter.java:51)
at org.gradle.launcher.exec.DaemonUsageSuggestingBuildActionExecuter.execute(DaemonUsageSuggestingBuildActionExecuter.java:28)
at org.gradle.launcher.cli.RunBuildAction.run(RunBuildAction.java:43)
at org.gradle.internal.Actions$RunnableActionAdapter.execute(Actions.java:173)
at org.gradle.launcher.cli.CommandLineActionFactory$ParseAndBuildAction.execute(CommandLineActionFactory.java:239)
at org.gradle.launcher.cli.CommandLineActionFactory$ParseAndBuildAction.execute(CommandLineActionFactory.java:212)
at org.gradle.launcher.cli.JavaRuntimeValidationAction.execute(JavaRuntimeValidationAction.java:35)
at org.gradle.launcher.cli.JavaRuntimeValidationAction.execute(JavaRuntimeValidationAction.java:24)
at org.gradle.launcher.cli.ExceptionReportingAction.execute(ExceptionReportingAction.java:33)
at org.gradle.launcher.cli.ExceptionReportingAction.execute(ExceptionReportingAction.java:22)
at org.gradle.launcher.cli.CommandLineActionFactory$WithLogging.execute(CommandLineActionFactory.java:205)
at org.gradle.launcher.cli.CommandLineActionFactory$WithLogging.execute(CommandLineActionFactory.java:169)
at org.gradle.launcher.Main.doAction(Main.java:33)
at org.gradle.launcher.bootstrap.EntryPoint.run(EntryPoint.java:45)
at sun.reflect.NativeMethodAccessorImpl.invoke0(Native Method)
at sun.reflect.NativeMethodAccessorImpl.invoke(NativeMethodAccessorImpl.java:62)
at sun.reflect.DelegatingMethodAccessorImpl.invoke(DelegatingMethodAccessorImpl.java:43)
at java.lang.reflect.Method.invoke(Method.java:498)
at org.gradle.launcher.bootstrap.ProcessBootstrap.runNoExit(ProcessBootstrap.java:55)
at org.gradle.launcher.bootstrap.ProcessBootstrap.run(ProcessBootstrap.java:36)
at org.gradle.launcher.GradleMain.main(GradleMain.java:23)
at sun.reflect.NativeMethodAccessorImpl.invoke0(Native Method)
at sun.reflect.NativeMethodAccessorImpl.invoke(NativeMethodAccessorImpl.java:62)
at sun.reflect.DelegatingMethodAccessorImpl.invoke(DelegatingMethodAccessorImpl.java:43)
at java.lang.reflect.Method.invoke(Method.java:498)
at org.gradle.wrapper.BootstrapMainStarter.start(BootstrapMainStarter.java:30)
at org.gradle.wrapper.WrapperExecutor.execute(WrapperExecutor.java:127)
at org.gradle.wrapper.GradleWrapperMain.main(GradleWrapperMain.java:61)
:app:installDebug FAILED

Solution:
update gradle version in build.gradle file of your android project
classpath ‘com.android.tools.build:gradle:3.0.1’

5.

Problem
Building and installing the app on the device (cd android && ./gradlew installDebug)…

FAILURE: Build failed with an exception.

* What went wrong:
A problem occurred configuring root project ‘testApp’.
> Could not resolve all dependencies for configuration ‘:classpath’.
> Could not find com.android.tools.build:gradle:3.0.1.
Searched in the following locations:
https://jcenter.bintray.com/com/android/tools/build/gradle/3.0.1/gradle-3.0.1.pom
https://jcenter.bintray.com/com/android/tools/build/gradle/3.0.1/gradle-3.0.1.jar
Required by:
:testApp:unspecified

* Try:
Run with –stacktrace option to get the stack trace. Run with –info or –debug option to get more log output.

BUILD FAILED

Total time: 10.721 secs
Could not install the app on the device, read the error above for details.
Make sure you have an Android emulator running or a device connected and have
set up your Android development environment:
https://facebook.github.io/react-native/docs/android-setup.html

Solution:
add google() to your build script, as follows

buildscript {
    repositories {
        google()
        jcenter()
    }


6. Problem

FAILURE: Build failed with an exception.

* Where:
Build file ‘/testapp/android/build.gradle’ line: 5

* What went wrong:
A problem occurred evaluating root project ‘testApp’.
> Could not find method google() for arguments [] on repository container.

* Try:
Run with –stacktrace option to get the stack trace. Run with –info or –debug option to get more log output.

BUILD FAILED

Total time: 1.973 secs
Could not install the app on the device, read the error above for details.
Make sure you have an Android emulator running or a device connected and have
set up your Android development environment:
https://facebook.github.io/react-native/docs/android-setup.html

Solution:
in your android/gradle/wrapper/gradle-wrapper.properties file check whether you have gradle distribution version 4,
it should be as follow.

distributionUrl=https\://services.gradle.org/distributions/gradle-4.1-all.zip

7. After this build success
8. Now facing Run-time exception of something like this

react android run Couldn’t find preset\ babel-preset-react native stage 0

error: bundling failed: “TransformError: D:\\path\\path\\project\\index.android.js: Unex
pected token ) (While processing preset: \”D:\\\\path\\\\path\\\\project\\\\node_modules
\\\\babel-preset-react-native\\\\index.js\”)”

Solution : Remove “babel-preset-react-native-stage-0/decorator-support” from your .bablerc file, Your bablerc file should look as follows

{
  "presets": [
    "react-native"
  ],
  "env": {
    "development": {
      "plugins": [
        "transform-react-jsx-source"
      ]
    }
  }
}