React Native: Ejecting Expo To Regular React Native Project.
Before explaining the steps for eject from expo, I would like to thank the expo community who has done really a great job, it was nightmare for us to start with ReactNative initially without expo. Expo has done remarkable job and simplified the whole process to us. So we should thank expo community for that. But Expo has come up with its own limitations, it is really difficult to go forward with those limitations, hence ejecting from expo is must.
Follow below steps and find the issues listed in each step and the solutions for the issues faced during eject process. Follow all the below steps
1. npm run eject
? How would you like to eject from create-react-native-app? (Use arrow keys)
❯ React Native: I'd like a regular React Native project.
  ExpoKit: I'll create or log in with an Expo account to use React Native and the Expo SDK.
  Cancel: I'll continue with my current project structure.
Choose 1st option
2. then run the command
react-native run-android
Building and installing the app on the device (cd android && ./gradlew installDebug)…
Problem:
FAILURE: Build failed with an exception.
* What went wrong:
A problem occurred configuring project ‘:app’.
> SDK location not found. Define location with sdk.dir in the local.properties file or with an ANDROID_HOME environment variable.
* Try:
Run with –stacktrace option to get the stack trace. Run with –info or –debug option to get more log output.
BUILD FAILED
Total time: 45.174 secs
Could not install the app on the device, read the error above for details.
Make sure you have an Android emulator running or a device connected and have
set up your Android development environment:
https://facebook.github.io/react-native/docs/android-setup.html
Solution:
Create local.properties in the andoid project folder and save the below content in that
sdk.dir = /Users/USERNAME/Library/Android/sdk
USERNAME: USERNAME should be your maachine user name
3. run the command
$ sudo react-native run-android
Problem:
FAILURE: Build failed with an exception.
* What went wrong:
Execution failed for task ‘:app:installDebug’.
> com.android.builder.testing.api.DeviceException: No connected devices!
* Try:
Run with –stacktrace option to get the stack trace. Run with –info or –debug option to get more log output.
BUILD FAILED
Total time: 6.945 secs
Could not install the app on the device, read the error above for details.
Make sure you have an Android emulator running or a device connected and have
set up your Android development environment:
https://facebook.github.io/react-native/docs/android-setup.html
Solution : Use proper cable and connect your device, enable debug mode in your android device. this is problem with some devices, do not spend time on this, because you will face bigger problems later 🙂 so either change the device or try with different cable.
4. Problem
com.android.ddmlib.InstallException: Failed to install all
at com.android.ddmlib.SplitApkInstaller.install(SplitApkInstaller.java:89)
at com.android.ddmlib.Device.installPackages(Device.java:904)
at com.android.builder.testing.ConnectedDevice.installPackages(ConnectedDevice.java:137)
at com.android.build.gradle.internal.tasks.InstallVariantTask.install(InstallVariantTask.java:134)
at sun.reflect.NativeMethodAccessorImpl.invoke0(Native Method)
at sun.reflect.NativeMethodAccessorImpl.invoke(NativeMethodAccessorImpl.java:62)
at sun.reflect.DelegatingMethodAccessorImpl.invoke(DelegatingMethodAccessorImpl.java:43)
at java.lang.reflect.Method.invoke(Method.java:498)
at org.gradle.internal.reflect.JavaMethod.invoke(JavaMethod.java:75)
at org.gradle.api.internal.project.taskfactory.AnnotationProcessingTaskFactory$StandardTaskAction.doExecute(AnnotationProcessingTaskFactory.java:228)
at org.gradle.api.internal.project.taskfactory.AnnotationProcessingTaskFactory$StandardTaskAction.execute(AnnotationProcessingTaskFactory.java:221)
at org.gradle.api.internal.project.taskfactory.AnnotationProcessingTaskFactory$StandardTaskAction.execute(AnnotationProcessingTaskFactory.java:210)
at org.gradle.api.internal.AbstractTask$TaskActionWrapper.execute(AbstractTask.java:621)
at org.gradle.api.internal.AbstractTask$TaskActionWrapper.execute(AbstractTask.java:604)
at org.gradle.api.internal.tasks.execution.ExecuteActionsTaskExecuter.executeAction(ExecuteActionsTaskExecuter.java:80)
at org.gradle.api.internal.tasks.execution.ExecuteActionsTaskExecuter.executeActions(ExecuteActionsTaskExecuter.java:61)
at org.gradle.api.internal.tasks.execution.ExecuteActionsTaskExecuter.execute(ExecuteActionsTaskExecuter.java:46)
at org.gradle.api.internal.tasks.execution.PostExecutionAnalysisTaskExecuter.execute(PostExecutionAnalysisTaskExecuter.java:35)
at org.gradle.api.internal.tasks.execution.SkipUpToDateTaskExecuter.execute(SkipUpToDateTaskExecuter.java:66)
at org.gradle.api.internal.tasks.execution.ValidatingTaskExecuter.execute(ValidatingTaskExecuter.java:58)
at org.gradle.api.internal.tasks.execution.SkipEmptySourceFilesTaskExecuter.execute(SkipEmptySourceFilesTaskExecuter.java:52)
at org.gradle.api.internal.tasks.execution.SkipTaskWithNoActionsExecuter.execute(SkipTaskWithNoActionsExecuter.java:52)
at org.gradle.api.internal.tasks.execution.SkipOnlyIfTaskExecuter.execute(SkipOnlyIfTaskExecuter.java:53)
at org.gradle.api.internal.tasks.execution.ExecuteAtMostOnceTaskExecuter.execute(ExecuteAtMostOnceTaskExecuter.java:43)
at org.gradle.execution.taskgraph.DefaultTaskGraphExecuter$EventFiringTaskWorker.execute(DefaultTaskGraphExecuter.java:203)
at org.gradle.execution.taskgraph.DefaultTaskGraphExecuter$EventFiringTaskWorker.execute(DefaultTaskGraphExecuter.java:185)
at org.gradle.execution.taskgraph.AbstractTaskPlanExecutor$TaskExecutorWorker.processTask(AbstractTaskPlanExecutor.java:66)
at org.gradle.execution.taskgraph.AbstractTaskPlanExecutor$TaskExecutorWorker.run(AbstractTaskPlanExecutor.java:50)
at org.gradle.execution.taskgraph.DefaultTaskPlanExecutor.process(DefaultTaskPlanExecutor.java:25)
at org.gradle.execution.taskgraph.DefaultTaskGraphExecuter.execute(DefaultTaskGraphExecuter.java:110)
at org.gradle.execution.SelectedTaskExecutionAction.execute(SelectedTaskExecutionAction.java:37)
at org.gradle.execution.DefaultBuildExecuter.execute(DefaultBuildExecuter.java:37)
at org.gradle.execution.DefaultBuildExecuter.access$000(DefaultBuildExecuter.java:23)
at org.gradle.execution.DefaultBuildExecuter$1.proceed(DefaultBuildExecuter.java:43)
at org.gradle.execution.DryRunBuildExecutionAction.execute(DryRunBuildExecutionAction.java:32)
at org.gradle.execution.DefaultBuildExecuter.execute(DefaultBuildExecuter.java:37)
at org.gradle.execution.DefaultBuildExecuter.execute(DefaultBuildExecuter.java:30)
at org.gradle.initialization.DefaultGradleLauncher$4.run(DefaultGradleLauncher.java:153)
at org.gradle.internal.Factories$1.create(Factories.java:22)
at org.gradle.internal.progress.DefaultBuildOperationExecutor.run(DefaultBuildOperationExecutor.java:91)
at org.gradle.internal.progress.DefaultBuildOperationExecutor.run(DefaultBuildOperationExecutor.java:53)
at org.gradle.initialization.DefaultGradleLauncher.doBuildStages(DefaultGradleLauncher.java:150)
at org.gradle.initialization.DefaultGradleLauncher.access$200(DefaultGradleLauncher.java:32)
at org.gradle.initialization.DefaultGradleLauncher$1.create(DefaultGradleLauncher.java:98)
at org.gradle.initialization.DefaultGradleLauncher$1.create(DefaultGradleLauncher.java:92)
at org.gradle.internal.progress.DefaultBuildOperationExecutor.run(DefaultBuildOperationExecutor.java:91)
at org.gradle.internal.progress.DefaultBuildOperationExecutor.run(DefaultBuildOperationExecutor.java:63)
at org.gradle.initialization.DefaultGradleLauncher.doBuild(DefaultGradleLauncher.java:92)
at org.gradle.initialization.DefaultGradleLauncher.run(DefaultGradleLauncher.java:83)
at org.gradle.launcher.exec.InProcessBuildActionExecuter$DefaultBuildController.run(InProcessBuildActionExecuter.java:99)
at org.gradle.tooling.internal.provider.ExecuteBuildActionRunner.run(ExecuteBuildActionRunner.java:28)
at org.gradle.launcher.exec.ChainingBuildActionRunner.run(ChainingBuildActionRunner.java:35)
at org.gradle.launcher.exec.InProcessBuildActionExecuter.execute(InProcessBuildActionExecuter.java:48)
at org.gradle.launcher.exec.InProcessBuildActionExecuter.execute(InProcessBuildActionExecuter.java:30)
at org.gradle.launcher.exec.ContinuousBuildActionExecuter.execute(ContinuousBuildActionExecuter.java:81)
at org.gradle.launcher.exec.ContinuousBuildActionExecuter.execute(ContinuousBuildActionExecuter.java:46)
at org.gradle.launcher.exec.DaemonUsageSuggestingBuildActionExecuter.execute(DaemonUsageSuggestingBuildActionExecuter.java:51)
at org.gradle.launcher.exec.DaemonUsageSuggestingBuildActionExecuter.execute(DaemonUsageSuggestingBuildActionExecuter.java:28)
at org.gradle.launcher.cli.RunBuildAction.run(RunBuildAction.java:43)
at org.gradle.internal.Actions$RunnableActionAdapter.execute(Actions.java:173)
at org.gradle.launcher.cli.CommandLineActionFactory$ParseAndBuildAction.execute(CommandLineActionFactory.java:239)
at org.gradle.launcher.cli.CommandLineActionFactory$ParseAndBuildAction.execute(CommandLineActionFactory.java:212)
at org.gradle.launcher.cli.JavaRuntimeValidationAction.execute(JavaRuntimeValidationAction.java:35)
at org.gradle.launcher.cli.JavaRuntimeValidationAction.execute(JavaRuntimeValidationAction.java:24)
at org.gradle.launcher.cli.ExceptionReportingAction.execute(ExceptionReportingAction.java:33)
at org.gradle.launcher.cli.ExceptionReportingAction.execute(ExceptionReportingAction.java:22)
at org.gradle.launcher.cli.CommandLineActionFactory$WithLogging.execute(CommandLineActionFactory.java:205)
at org.gradle.launcher.cli.CommandLineActionFactory$WithLogging.execute(CommandLineActionFactory.java:169)
at org.gradle.launcher.Main.doAction(Main.java:33)
at org.gradle.launcher.bootstrap.EntryPoint.run(EntryPoint.java:45)
at sun.reflect.NativeMethodAccessorImpl.invoke0(Native Method)
at sun.reflect.NativeMethodAccessorImpl.invoke(NativeMethodAccessorImpl.java:62)
at sun.reflect.DelegatingMethodAccessorImpl.invoke(DelegatingMethodAccessorImpl.java:43)
at java.lang.reflect.Method.invoke(Method.java:498)
at org.gradle.launcher.bootstrap.ProcessBootstrap.runNoExit(ProcessBootstrap.java:55)
at org.gradle.launcher.bootstrap.ProcessBootstrap.run(ProcessBootstrap.java:36)
at org.gradle.launcher.GradleMain.main(GradleMain.java:23)
at sun.reflect.NativeMethodAccessorImpl.invoke0(Native Method)
at sun.reflect.NativeMethodAccessorImpl.invoke(NativeMethodAccessorImpl.java:62)
at sun.reflect.DelegatingMethodAccessorImpl.invoke(DelegatingMethodAccessorImpl.java:43)
at java.lang.reflect.Method.invoke(Method.java:498)
at org.gradle.wrapper.BootstrapMainStarter.start(BootstrapMainStarter.java:30)
at org.gradle.wrapper.WrapperExecutor.execute(WrapperExecutor.java:127)
at org.gradle.wrapper.GradleWrapperMain.main(GradleWrapperMain.java:61)
:app:installDebug FAILED
Solution:
update gradle version in build.gradle file of your android project
classpath ‘com.android.tools.build:gradle:3.0.1’
5.
Problem
Building and installing the app on the device (cd android && ./gradlew installDebug)…
FAILURE: Build failed with an exception.
* What went wrong:
A problem occurred configuring root project ‘testApp’.
> Could not resolve all dependencies for configuration ‘:classpath’.
> Could not find com.android.tools.build:gradle:3.0.1.
Searched in the following locations:
https://jcenter.bintray.com/com/android/tools/build/gradle/3.0.1/gradle-3.0.1.pom
https://jcenter.bintray.com/com/android/tools/build/gradle/3.0.1/gradle-3.0.1.jar
Required by:
:testApp:unspecified
* Try:
Run with –stacktrace option to get the stack trace. Run with –info or –debug option to get more log output.
BUILD FAILED
Total time: 10.721 secs
Could not install the app on the device, read the error above for details.
Make sure you have an Android emulator running or a device connected and have
set up your Android development environment:
https://facebook.github.io/react-native/docs/android-setup.html
Solution:
add google() to your build script, as follows
buildscript {
    repositories {
        google()
        jcenter()
    }
6. Problem
FAILURE: Build failed with an exception.
* Where:
Build file ‘/testapp/android/build.gradle’ line: 5
* What went wrong:
A problem occurred evaluating root project ‘testApp’.
> Could not find method google() for arguments [] on repository container.
* Try:
Run with –stacktrace option to get the stack trace. Run with –info or –debug option to get more log output.
BUILD FAILED
Total time: 1.973 secs
Could not install the app on the device, read the error above for details.
Make sure you have an Android emulator running or a device connected and have
set up your Android development environment:
https://facebook.github.io/react-native/docs/android-setup.html
Solution:
in your android/gradle/wrapper/gradle-wrapper.properties file check whether you have gradle distribution version 4,
it should be as follow.
distributionUrl=https\://services.gradle.org/distributions/gradle-4.1-all.zip
7. After this build success
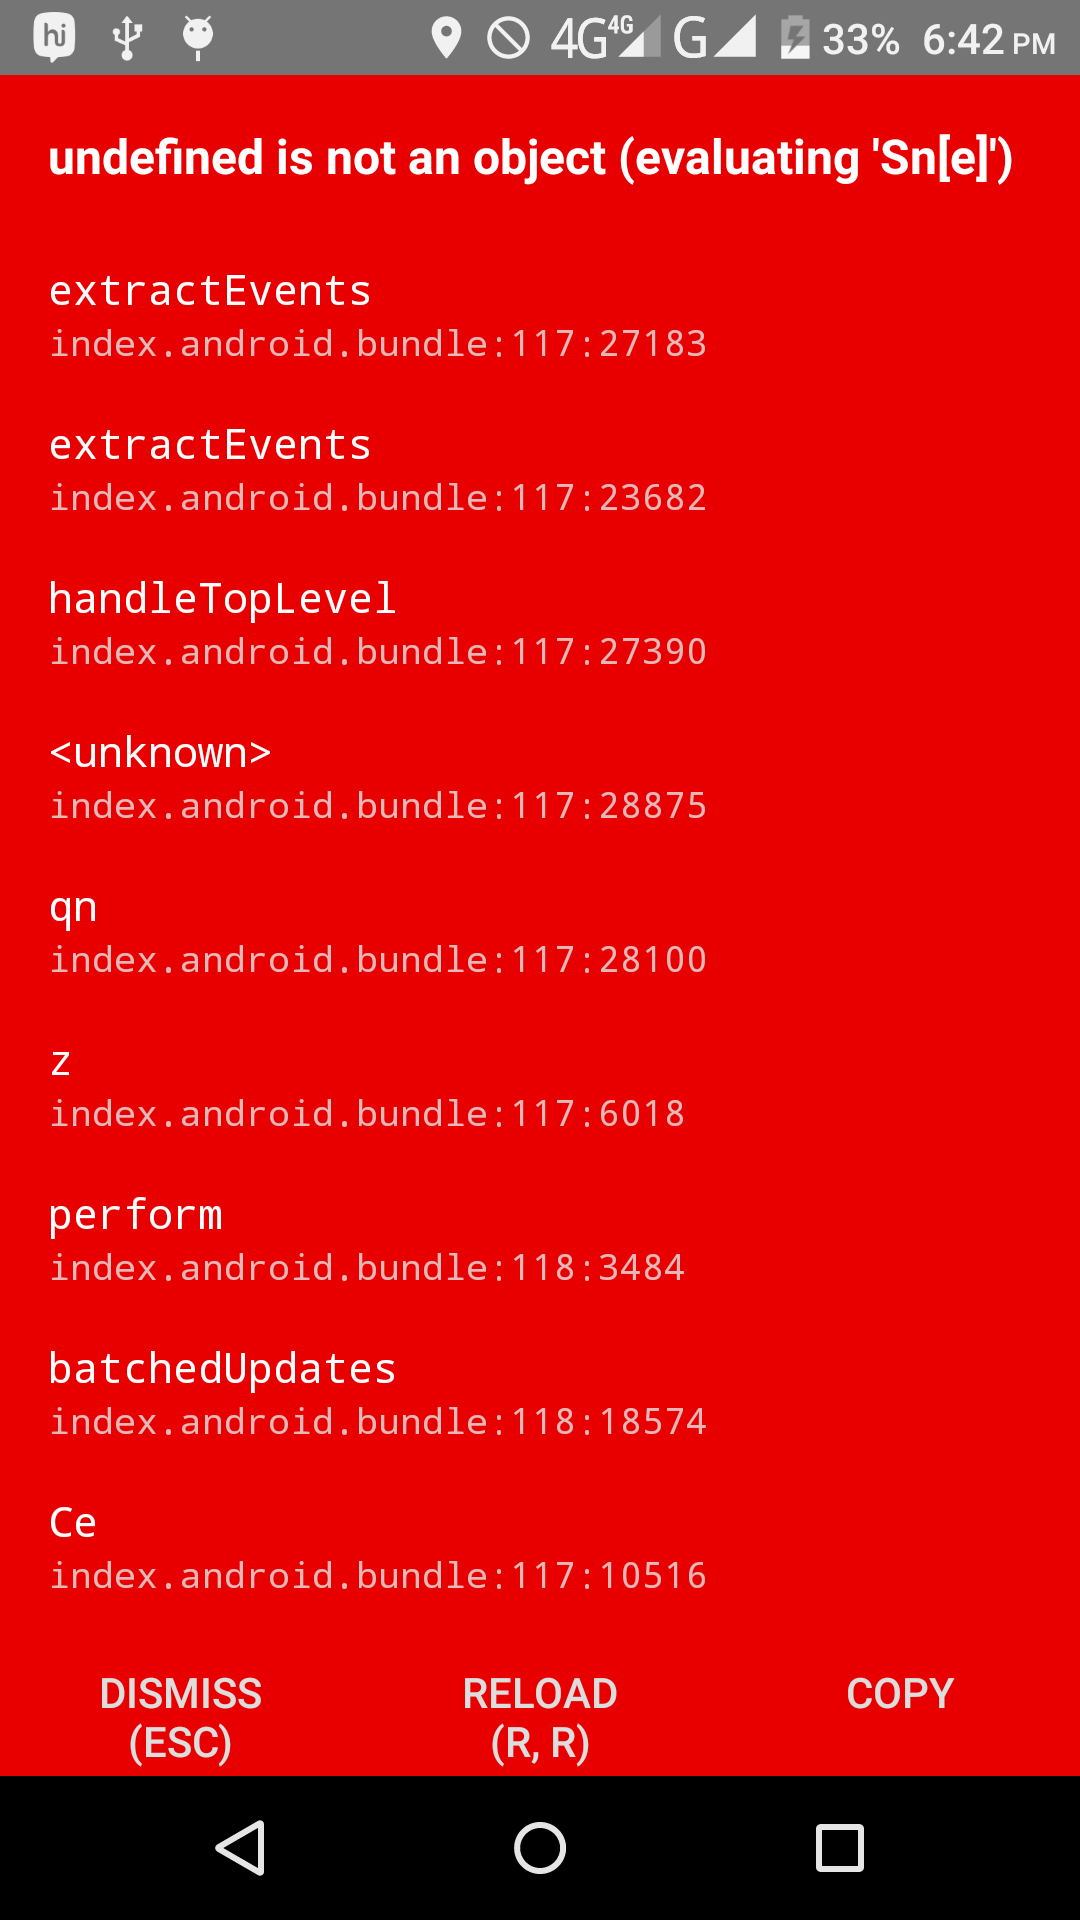
8. Now facing Run-time exception of something like this
react android run Couldn’t find preset\ babel-preset-react native stage 0
error: bundling failed: “TransformError: D:\\path\\path\\project\\index.android.js: Unex
pected token ) (While processing preset: \”D:\\\\path\\\\path\\\\project\\\\node_modules
\\\\babel-preset-react-native\\\\index.js\”)”
Solution : Remove “babel-preset-react-native-stage-0/decorator-support” from your .bablerc file, Your bablerc file should look as follows
{
  "presets": [
    "react-native"
  ],
  "env": {
    "development": {
      "plugins": [
        "transform-react-jsx-source"
      ]
    }
  }
}