What is Jira?
Jira is a software application developed by the Australian software company Atlassian that allows teams to track issues,manage projects, and automate workflows.
What is the JIRA workflow?
In JIRA, workflow is used to track the lifecycle of an Issue. Workflow is a record of statuses and transitions of an issue during its lifecycle. A status represents the stage of an issue at a particular point. An issue can be in only one status at a given point of time like Opened, To Do, Done, Closed, Assigned, etc.
A transition is a link between two statuses when an issue moves from one status to another. For an issue to move between two statuses, a transition must exist. In a simple way, a transition is some kind of work done on the issue, while status is the impact of work on that issue.
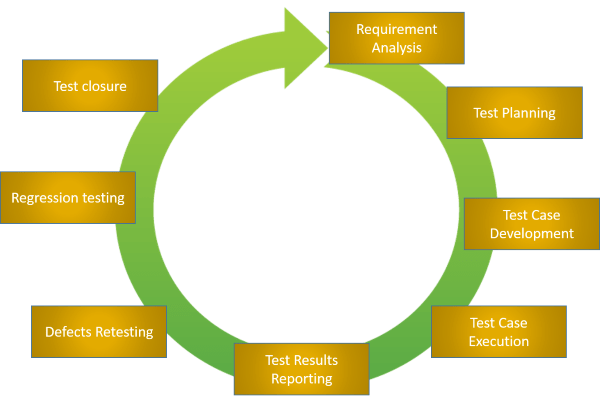
JIRA workflow has the following stages to track as soon as an issue is created −
Open issue- After creation, the issue is open and can be assigned to the assignee to start working on it.
In Progress Issue − The assignee has actively started to work on the issue.
Resolved Issue − All sub-tasks and works of that Issue are completed. Now, the issue is waiting to be verified by the reporter. If verification is successful, it will be closed or re-opened, if any further changes are required.
Reopened Issue − This issue was resolved previously, but the resolution was either incorrect or missed a few things or some modifications are required. From the Reopened stage, issues are marked either as assigned or resolved.
Close Issue- The issue is considered as finished, resolution is correct as of now. Closed issues can be re-opened later based on the requirement
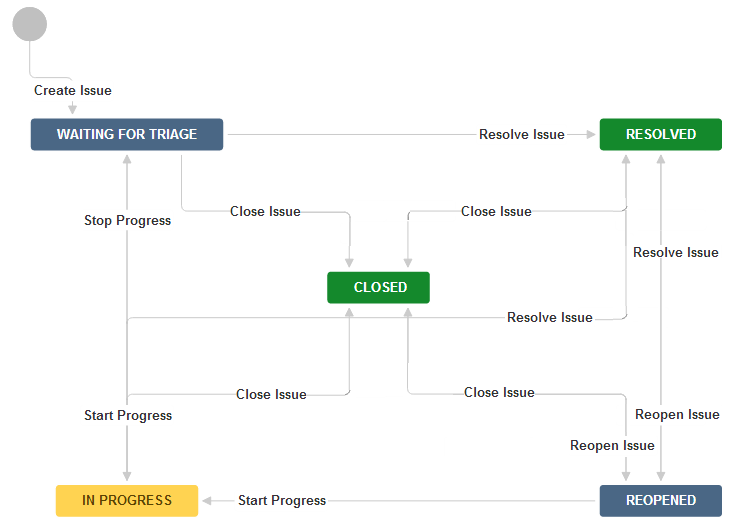
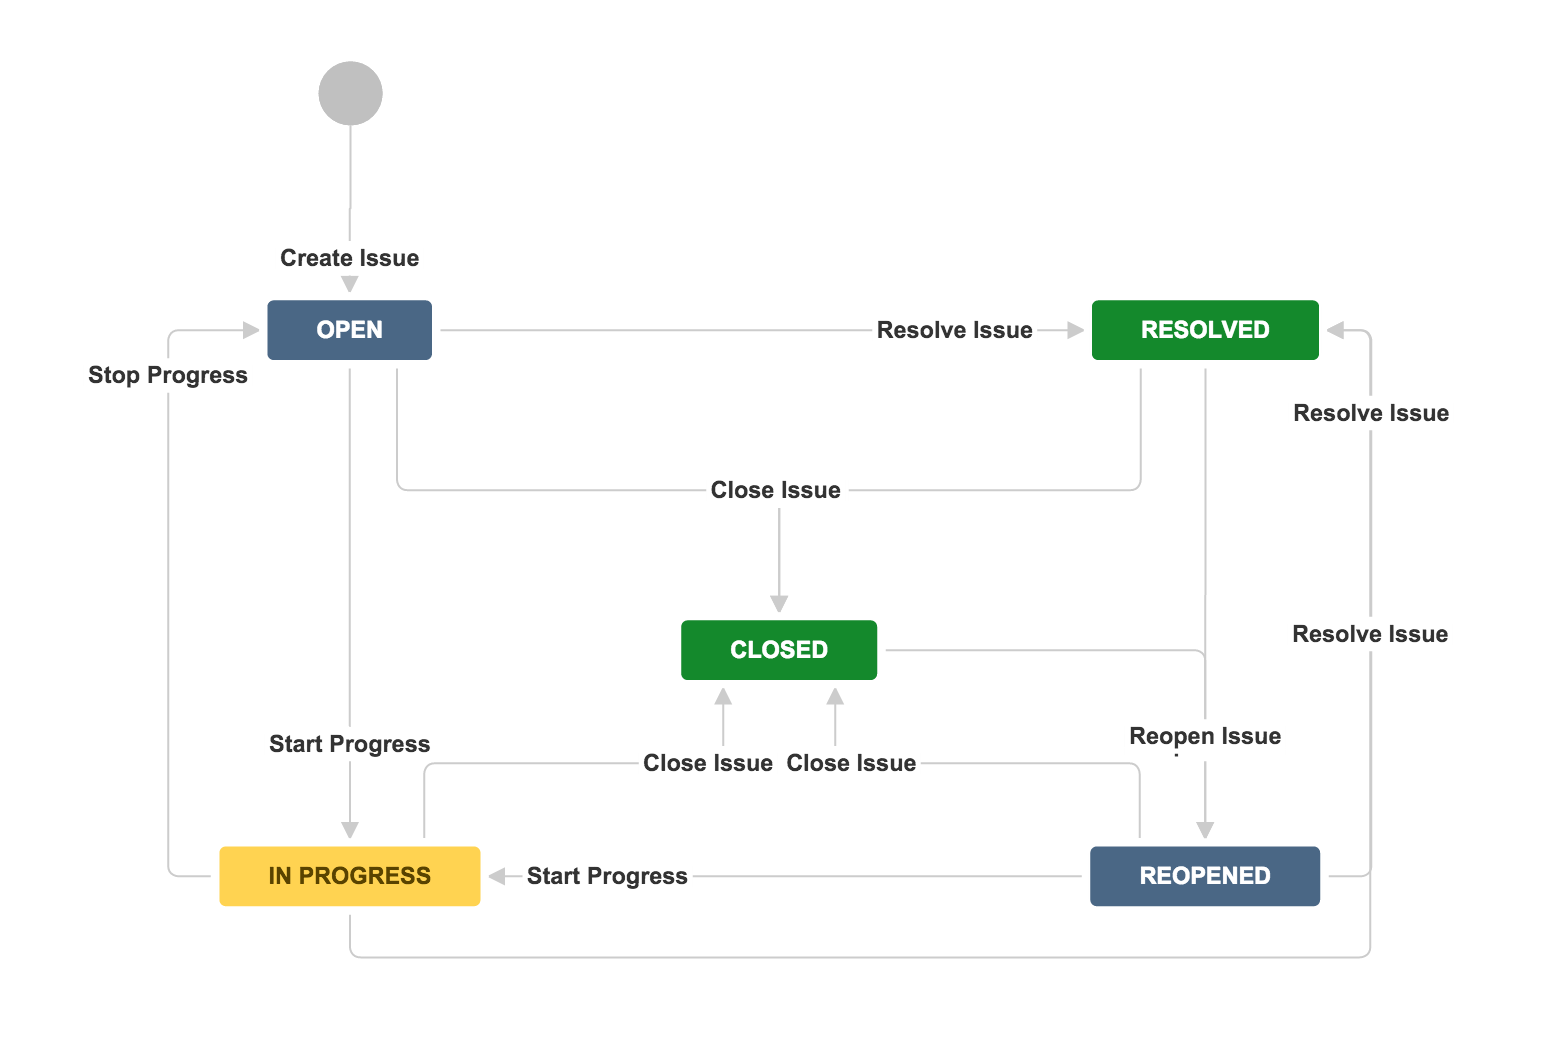
JIRA Workflow can be referred to as a Defect Lifecycle. It follows the same concepts; the only difference is that it is generic for all issues rather than limited to Defects only.
The following diagram shows a standard workflow −
How to Create a New Workflow in Jira
- Open Jira.
- Click Issues, and then click Workflows.
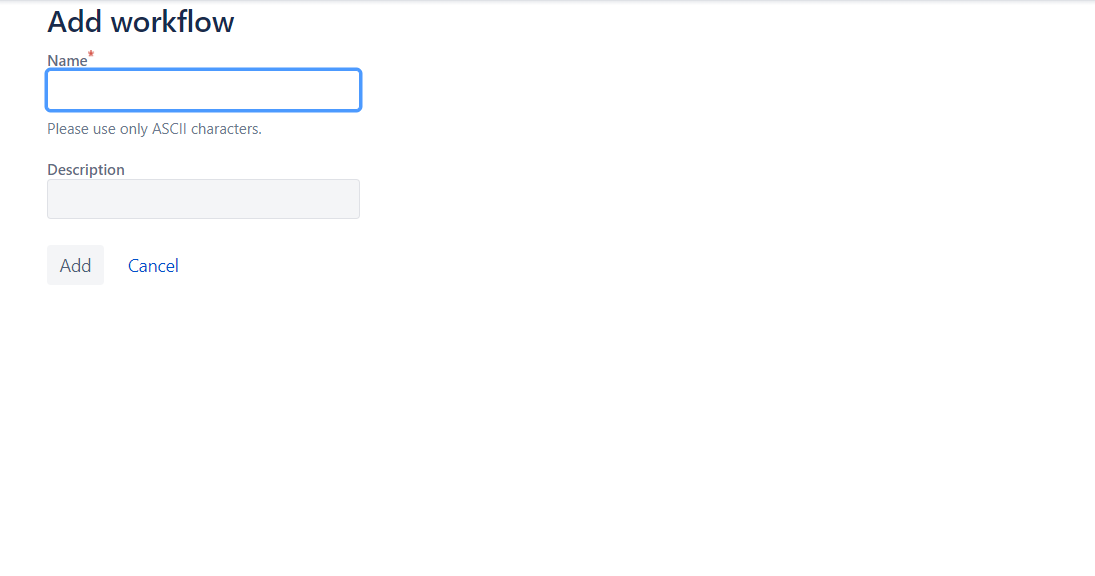
- To create a new workflow, click the Add workflow button.


- Type in a name and add a workflow description. The new workflow opens and is ready to edit.
5. Repeat step 4 to add as many states as you would like to add as per your company process.
6. After adding all the states, draw transitions between states.
How to Configure a New or Existing Workflow
You can add states and transitions to new or existing workflows. Keep in mind that some restrictions are placed on the editing of active workflows. You edit Jira workflows in the Workflow Designer, using either the Diagram or Text view.
Use the diagram format for an overview of your workflow as you build it. The text version expedites adding labels and descriptions to steps and transitions. For the purposes of this tutorial, we’ll work in the Diagram view. For more information on planning and creating a new workflow, see The Essential Guide to Jira Workflow Best Practices.
- Click Add status button to add your first status. Name your new status. Important: You can reuse an existing status found in active workflows, but any changes you make to it will affect other workflows. Click Add.
INSERT WORKFLOWS NEWFLOW IMAGE - Repeat the previous step to add the next step in the workflow. You can create all the steps at once and then add the transitions, or you can add transitions as you create each step. You can click and drag the step boxes to arrange them in a pattern that shows the logic of the workflow. Keep in mind that you should publish the finished diagram to your team so they can understand the workflow.
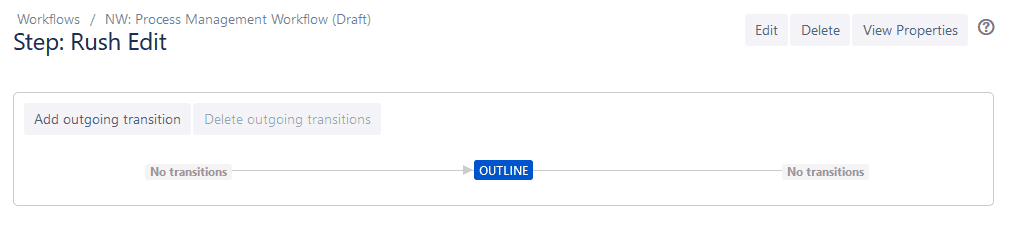
- To add a transition, click Add transition.
- Specify where you want the transition to go. Name it and click Add.
- When using a workflow, you may want to return a work item to a previous status. To do this, you must add an extra transition between steps. After you add all the statuses and transitions forward and back (where appropriate), your workflow should look something like this:
INSERT JIRA WORKFLOW IMAGE
Your new workflow appears on the Workflows page at the bottom in the Inactive list.
Delete a Step
You can delete a step only if it has no transitions.
- Click the Delete Step link.
Add a Transition Screen
If you need user input during a transition, you can display a screen on transition. Jira calls this a View screen.
- In your workflow, click the Edit button.
- In the Diagram, select the transition you want to change. Click the Edit button.
- Select a screen from the Screen box. Default Screen and Resolve Issue Screens show the complete form for the issue with all available fields. The Workflow Screen allows you to assign the work item to a user and add a comment. Click the Save button.
- Click Update.


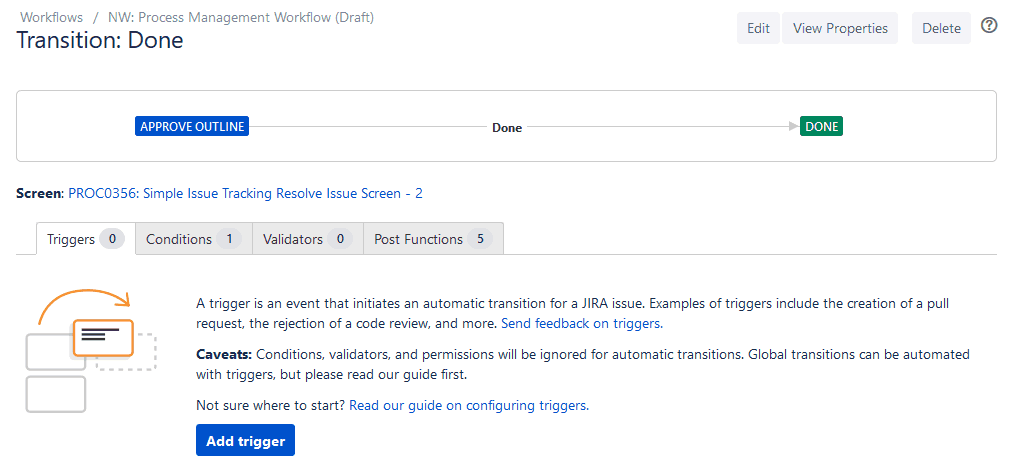
Add a Trigger
- In your workflow, select the transition where you want to add a trigger. Click Edit.
- In the Workflow Editor, select the transition again. In the properties panel, click Triggers.
- Click Add Trigger.
- Select the trigger type, and then click Next.
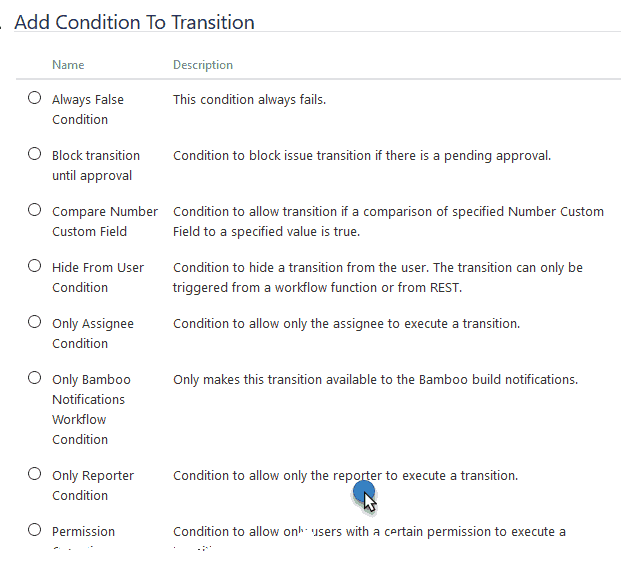
Add Conditions
- In your workflow, select the transition to which you want to add a condition.
- In the properties panel, click Conditions.
- Click Add Condition.
- Select the condition you want from the list.
- Click Add.


Add a Validator
- In your workflow, select the transition to which you want to add a validator.
- In the properties panel, click Validators.
- Click Add validator.
- Select the validator and click Add.

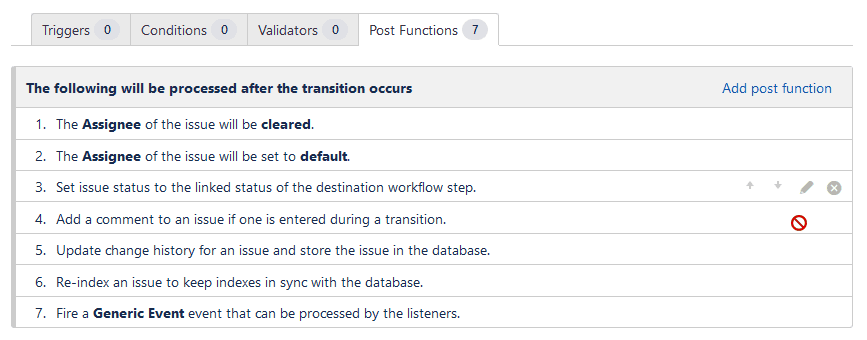
Customize and Apply a Post Function
- In your workflow, select the transition you want to edit.
- Click Post Functions. Click Add Post Function.
- Select the function you want. Click Add.
- On the Add Parameters page, specify any new settings. Click Add.
- Click Add.


How to Activate the New Workflow
- Create a new project or open an existing project.
- Click Project Settings. Click Workflows.
- Click Add Workflow.
- Click Add Existing. Select the new workflow. Click Next.
- Click the types of issues you want to associate with the workflow.
- Click the Finish button.
- Click the Publish button.
- On the Publish Workflows page, you’ll be asked to associate the current status of each item with the new status. It’s OK if you have more new statuses than are available to map.
- When you’re done making the matches, click Associate. The issues are migrated to the new workflows. Click Acknowledge.
- Click Board Settings.
- Arrange the unmapped statuses. Create and rename new columns as needed. Learn more about Jira Kanban boards.


Importance of JIRA workflow?
Jira workflow is a critical aspect of effectively managing projects and tasks in an organization. It provides a systematic and structured approach to track and control the progress of work items from initiation to completion. Here are some key reasons highlighting the importance of Jira workflow:
- Process standardization: Jira workflows enable organizations to define and enforce standardized processes for handling different types of work items. By creating consistent steps and transitions, teams can ensure that tasks are executed in a consistent and predictable manner, leading to improved efficiency and reduced errors.
- Transparency and visibility: Jira workflows provide clear visibility into the status of work items at any given time. Team members can easily understand where a task stands in the workflow, who is responsible for its completion, and what steps are required next. This transparency fosters collaboration, enables better communication, and helps stakeholders make informed decisions.
- Accountability and ownership: With Jira workflows, it becomes clear who is responsible for each step in the process. Assigning specific statuses and actions to individuals or teams promotes accountability and ownership of tasks. This accountability ensures that work progresses smoothly and bottlenecks or delays can be addressed promptly.
- Efficient collaboration: Jira workflows facilitate collaboration between different teams and individuals involved in a project. Work items can be easily assigned, reassigned, or transitioned between different team members, ensuring smooth handoffs and preventing tasks from falling through the cracks. Collaboration features like comments, attachments, and notifications further enhance communication and coordination.
- Customizability and adaptability: Jira workflows are highly customizable to suit the unique needs of different projects or organizations. Workflow configurations can be tailored to reflect specific processes, approvals, and business rules. This flexibility allows teams to adapt and evolve their workflows as requirements change over time.
- Metrics and analytics: Jira workflows provide valuable data and metrics that can be used for performance analysis, process improvement, and decision-making. By tracking key performance indicators (KPIs) like cycle time, lead time, or bottlenecks, teams can identify areas for optimization, streamline processes, and improve overall efficiency.
- Integration with other tools: Jira integrates with a wide range of other software tools, such as development repositories, testing tools, and deployment systems. This integration allows for seamless data flow between different tools and provides a comprehensive view of the entire software development lifecycle. Work items can be linked to related code changes, test cases, and documentation, enabling end-to-end traceability.
Overall, Jira workflows play a crucial role in enhancing productivity, collaboration, and project management within an organization. They bring structure, clarity, and control to the work process, leading to improved efficiency, better team coordination, and successful project outcomes.
Posted by
Akshay Baratagi
Test Engineer