Amazon AWS EC2 Security Group and S3 Bucket configuration
Read our previous post : How to Create And Configure Amazon EC2 Free tier account
Amazon AWS is an awesome cloud service, It is worth writing a post on AWS service and its usage.
It is very easy to create an AWS account and use it, but most people will struck when its matter of security. Amazon setup is little bit complicated for security configuration. Please follow the steps given below to enable security group in your amazon cloud service.
Steps For Amazon EC2 Security Group:
Step 1: Go to your EC2 Service as shown in the image below

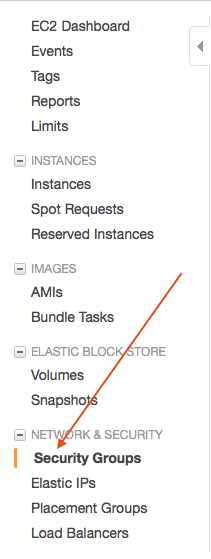
Step 2: Go to the section Security Group

Step 3: Enter Group Details

Step 4: Add following rules
Inbound
- Rule 1
Type : HTTP
Protocol : TCP
Port Range : 80
Source : 0.0.0.0/0
- Rule 2
Type : All traffic
Protocol : All traffic
Port Range : All traffic
Source : Your Ip Address ( search in google What Is My IP, copy paste the same IP here )
- Rule 3
Type : SSH
Protocol : TCP
Port Range : 22
Source : Your Security Group Id
- Rule 4
Type : MYSQL
Protocol : TCP
Port Range : Mysql port ( 3306 )
Source : Your Security Group Id
Outbound
- Rule 1
Type : HTTP
Protocol : TCP
Port Range : 80
Source : 0.0.0.0/0
- Rule 2
Type : All traffic
Protocol : All traffic
Port Range : All traffic
Source : Your Ip Address ( search in google What Is My IP, copy paste the same IP here )
- Rule 3
Type : MYSQL
Protocol : TCP
Port Range : Mysql port ( 3306 )
Source : Your Security Group Id
Amazon S3 Bucket configuration
Step 1 : Go to Administration and Security from Amazon Services

Step 2 : Select Group from the IAM page
Step 3: Create new group, Give any name for the group
Step 4: The most important step is to set Policy type for the S3 bucket.
For file upload/download, Select AmazonEC2FullAccess
If this is done then your Amazon S3 is ready for use.
Step 5: Go to S3 service from the main menu
There create new bucket. Set permissions to your bucket as per your need.
File Upload to Amazon S3 bucket in Java
Code Sample :
private static String bucketName = “”; //Give your YourS3Bucket name
private static String keyName = “”; // Give SomeKey

public final static String FOLDER_PATH = “TestFolder”;

public final static String rootServerURL = “”; //Your S3 Bucket Path => Your Amazon Instance / BucketName

BasicAWSCredentials awsCreds = new BasicAWSCredentials(“AccessKey”, “SecretKey”);

AmazonS3 s3client = new AmazonS3Client(awsCreds);

PutObjectRequest putObjectRequest = new PutObjectRequest(bucketName, keyName, fileObject);
putObjectRequest.withCannedAcl(CannedAccessControlList.PublicRead); // Read Permission for all
s3client.putObject(putObjectRequest);